Self-Enrolling YubiKeys on Windows
There are two methods for enrolling the YubiKey as a smart card for the Windows environment. This chapter covers the self-enrollment process, where a user enrolls their YubiKey directly to their domain-connected Windows PC. The other method allows for an administrator to enroll a YubiKey to another user directly.
If your environment has been set up to allow auto-enrollment, the process is straightforward. This section describes the steps you need to complete to enroll your YubiKey for Login.
With Auto-Enrollment enabled on the Windows Server and local machines via Group Policy, the end user experience is straightforward.
Log into a user account. A Certificate Enrollment popup appears above the System Tray.
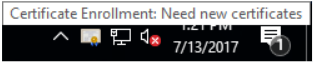
Click the Certificate Enrollment popup to open the Certificate Enrollment wizard. If the popup has disappeared (or did not initially appear) click the arrow in the System Tray to expand the list of options and click the certificate icon.
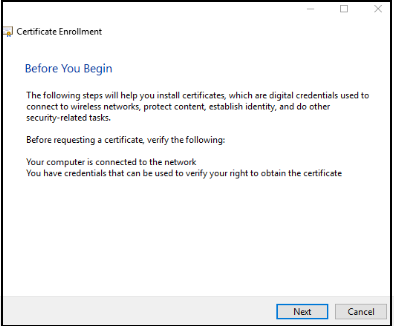
On the opening dialog, click Next.
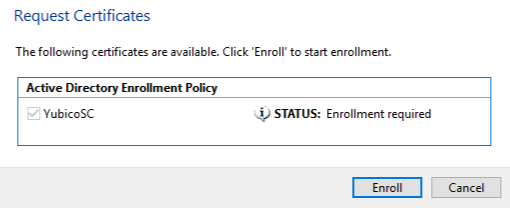
Select the appropriate certificate template and click Enroll. If multiple certificate templates are listed, assuming the template was set up properly, STATUS: Enrollment required appears next to the correct template.
Enter for PIN for your YubiKey and then click OK. If a PIN has not been set, enter the default PIN,
123456.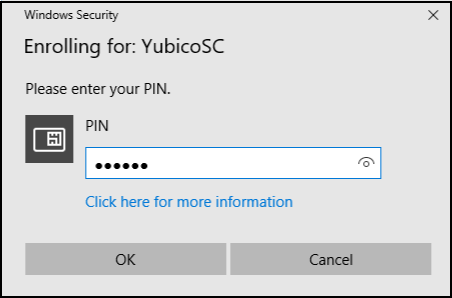
Windows Auto-Enrolls the YubiKey for Windows Login. The process can take several seconds, depending on the network connection to the server running the Certification Authority. When it is completed, click Finish.