Configuring Workflow Connections
In this step you will authorize and configure the Create shipment workflow connections.
Creating an API Token
When you add a Yubico card to a flow the first time you are prompted to authorize the connection using an API token for your organization.
To create an API token, sign in to the Customer Portal with the account for the application that will be calling the YubiEnterprise API. Click the organization name on the top of the left menu and select Manage API token. In the token dialog that appears, click Create API token and save the token for later use. For more information, see Creating API Tokens.
Creating Connection from Okta Org
Do the following to create the connection from the Okta org:
In the Okta Admin console, open Workflows and click Connections > New Connection.
Locate and select the Okta connector icon.
Add a display name for the connection in the Name field, and provide a description.
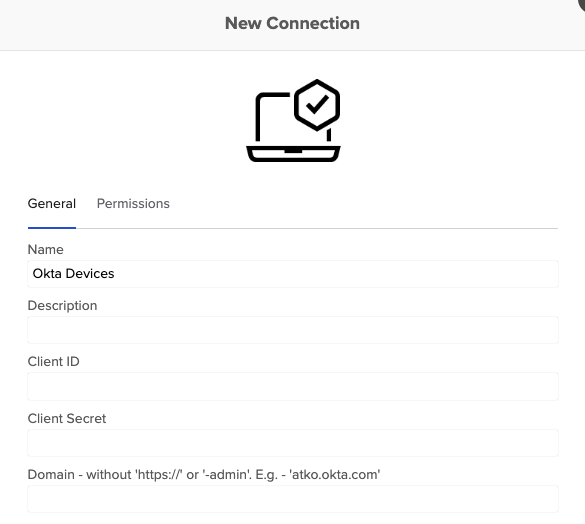
Enter the Client ID and Client Secret values provided in Okta Workflows OAuth.
In the Domain field, enter your Okta org domain without
https://, for example, company.okta.com. If your org uses a custom domain, enter the custom domain.Click Create.
Creating Connection from Yubico Org
Do the following to create a connection from the Yubico org:
If not already done, generate an API token as described in Creating an API Token. Save the API token in a location from where you can easily copy and paste it.
In the Okta Admin console, open Workflows and click Connections > New Connection.
Locate and select the Yubico connector icon.
Provide a display name for the connection in the Connection Nickname field, paste the previously generated API token into the API Secret field.
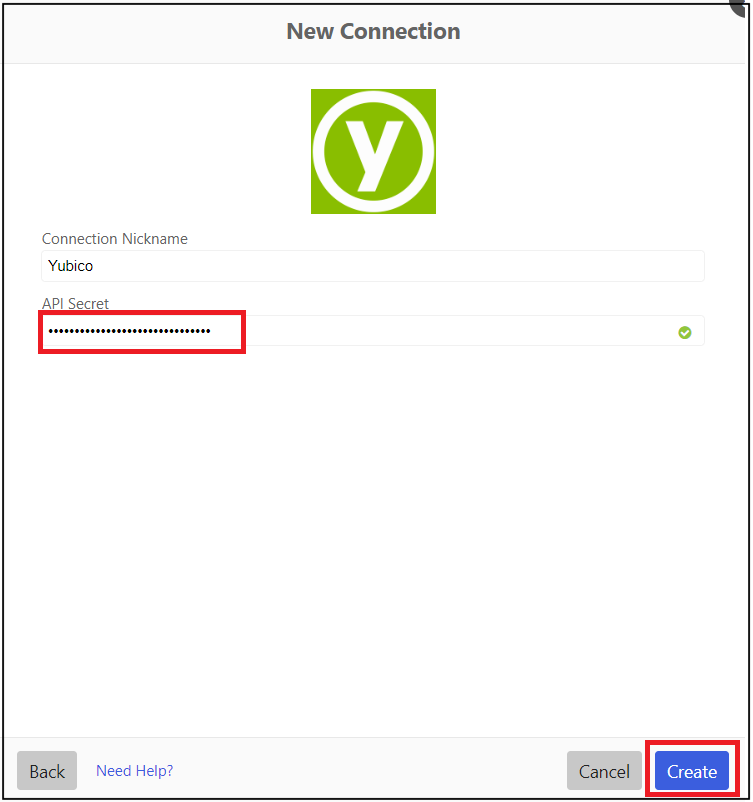
Click Create.
Updating the Create Shipment - Group Add Flow
If requesting a pre-enrolled YubiKey via the Group Add flow, you will need to add customization and product IDs to the Create shipment - Group Add flow as described in the following:
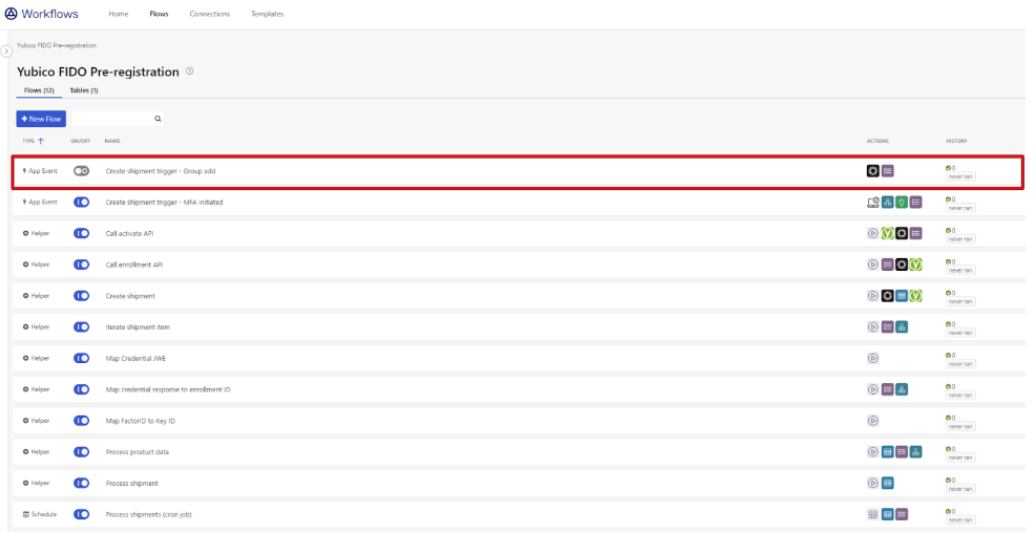
In the Okta Admin console, open Workflows, select Flows and open the Create shipment trigger - Group add workflow.
In the Create shipment page, open the dropdown menu on the Edit Conditions card.
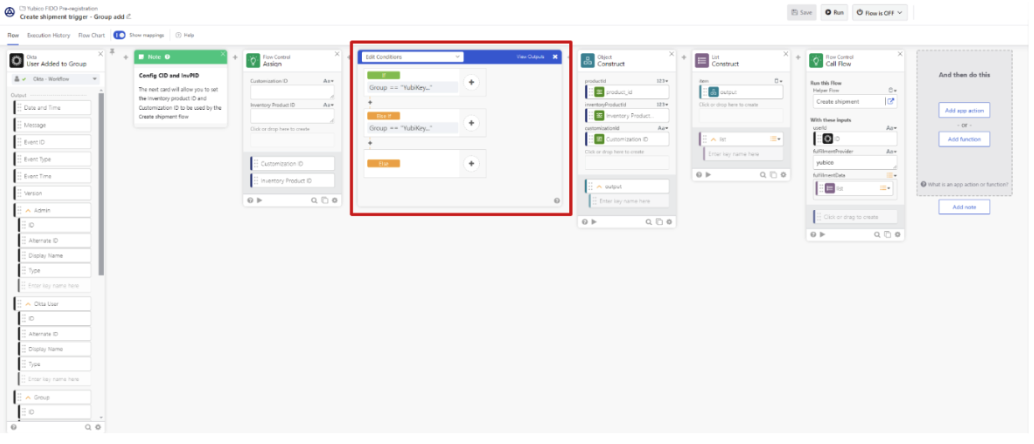
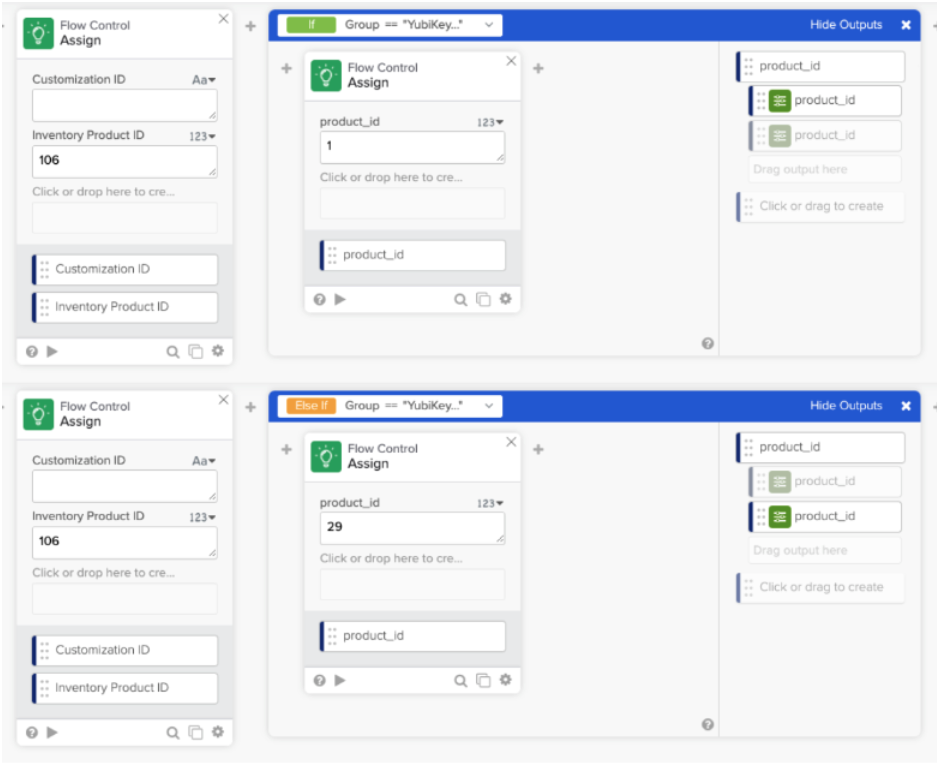
Update the fields as described below using input values provided by Yubico during onboarding of your organization. Note that in this example, the
product_idis “1” for key model YubiKey 5 NFC and “29” for key model YubiKey 5C NFC. For more information, see LINK.- If product_id (for YubiKey 5 NFC): Your Customization ID.
- If inventory_product_id: Your Subscription ID.
- Else if product_id (for YubiKey 5C NFC): Your Customization ID.
- Else if inventory_product_id: Your Subscription ID.
Click Save.