Creating Shipment Requests
In this step you will add new users for shipments and create a shipment request. In order to make a shipment request, the following information is required for the user, either from the Okta Universal Directory (UD) or from your organization’s HRIS (Human Resources Information System):
- First Name
- Last Name
- Street Address
- City
- State/Province/Territory (2-letter format codes)
- Postal Code
- Country Code
- Primary email
- Secondary email (for onboarding new users to receive a PIN)
- Primary phone number
- Organization
Adding New Users to Directory
The following describes how to add a new user with status “Staged” in Okta. For more information, see Create staged user (Okta documentation).
To add a new user, do the following:
- In the Okta Admin console, go to Directory > People and click Add person.
- In the Add Person dialog, enter information as follows:
- First name, Last name, and Username.
- Primary email (work email) for active users.
- Secondary email (personal email used prior to activation for new users).
- Do not assign the user to any YubiKey groups, this is done later.
- Set Activation to “Activate later”. This creates the user in status “Staged”.
- Click Save.
- On the People page, go to Staged > User > Profile > Edit.
- Enter the following information required for key shipment: Primary phone, Street address, City, State, Zip code, Country code, and Organization.
- Click Save.
Creating the Shipment Request
You can create shipment requests either through the Okta Admin console using Okta Groups, or using the API for batch shipment requests, see Integration Procedure.
In this example we will use the Pre-enrolled authenticators option in the Okta Workflows console to create a shipment request.
Note
Only one FIDO Pre-reg YubiKey at a time can be requested for an Okta tenant.
To create a shipment request, do the following:
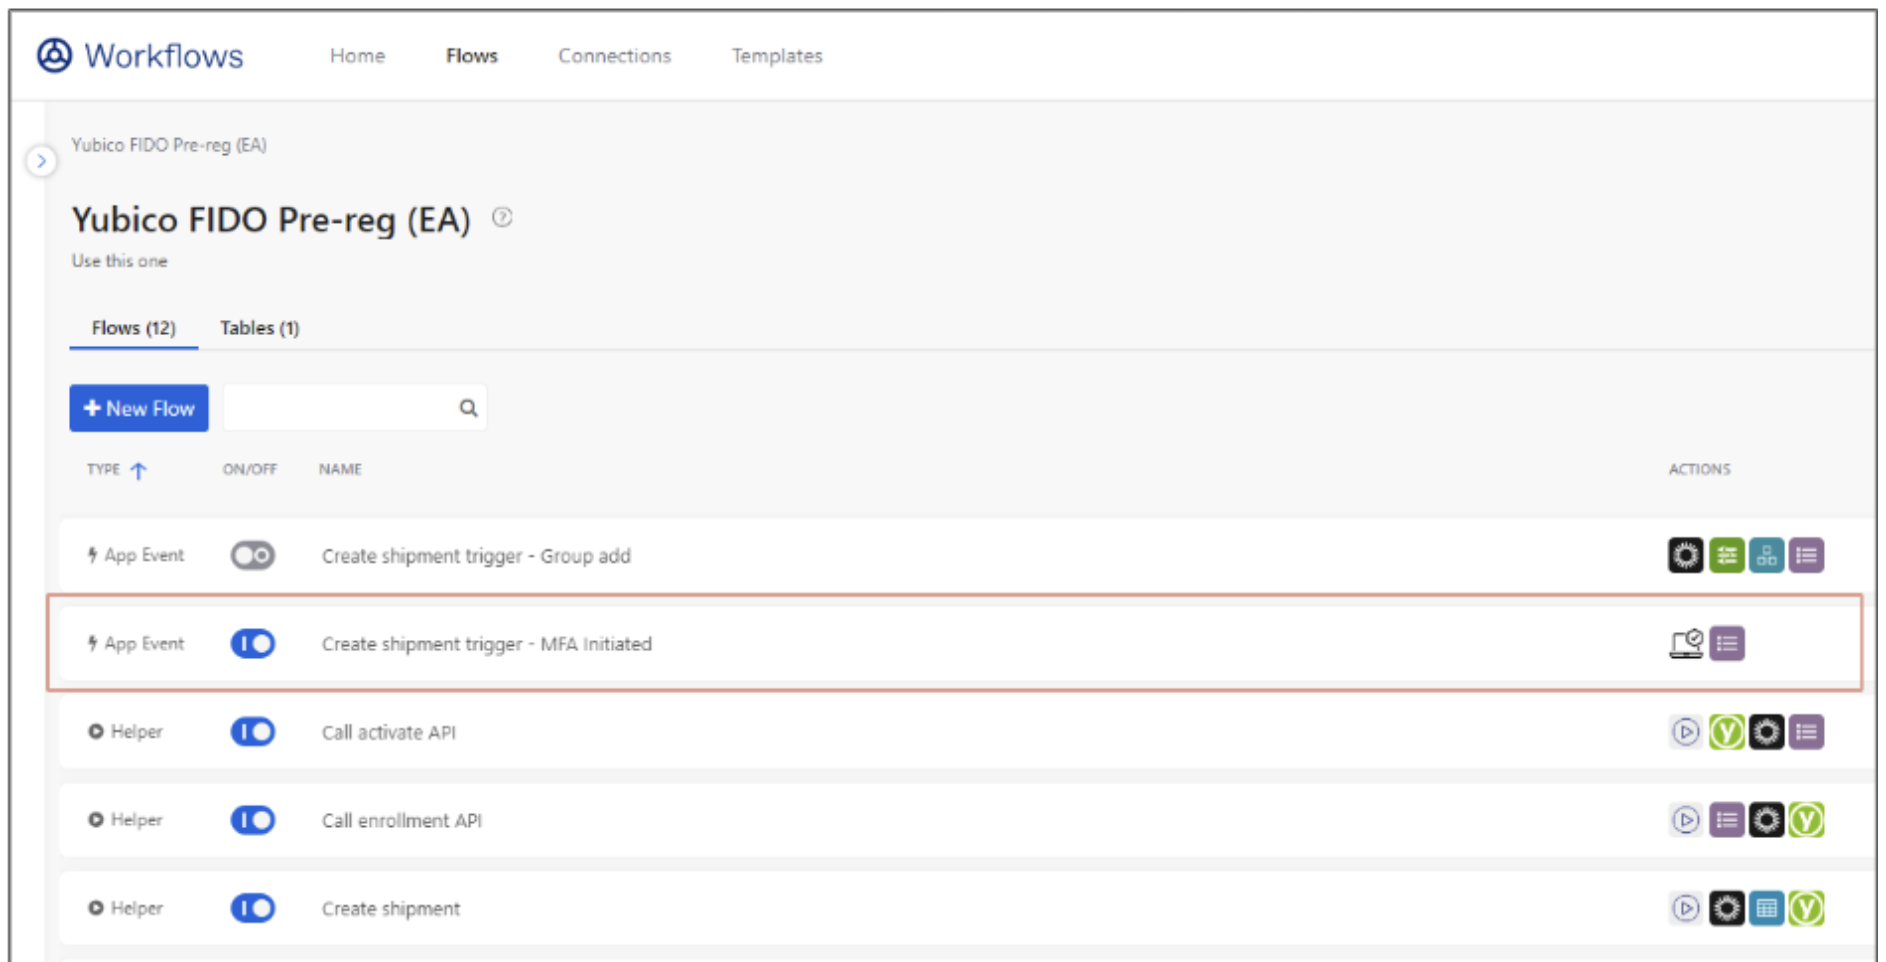
In the Okta Workflows console, ensure the Create shipment trigger - MFA initiated flow is enabled.
Note
It is recommended that only one flow at a time be enabled: either the Group Add or the MFA Initiated flow.
In the Okta Admin console, ensure the user to whom you want to ship the key has a profile in the user directory. If not, create a new user as described in Adding New Users to Directory.
Click the profile of the desired user and do the following:
- If using the Okta Universal Directory (UD) to source the shipping information, ensure this is populated in the user profile.
- Alternatively, confirm the user’s shipping information is being sourced from an HRIS or other source of truth.
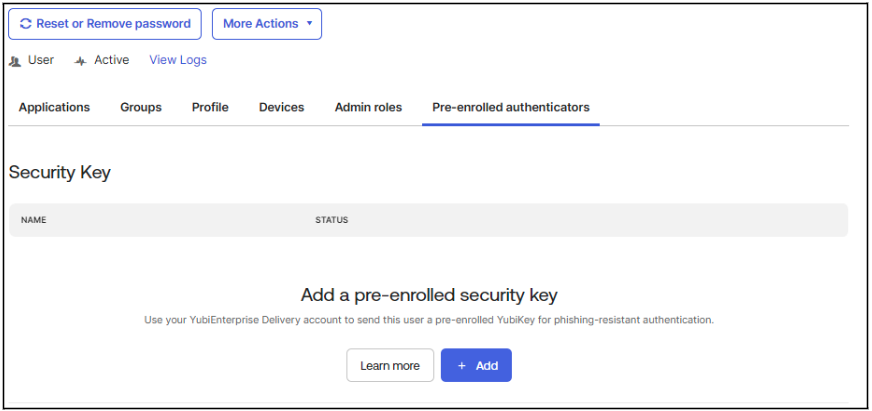
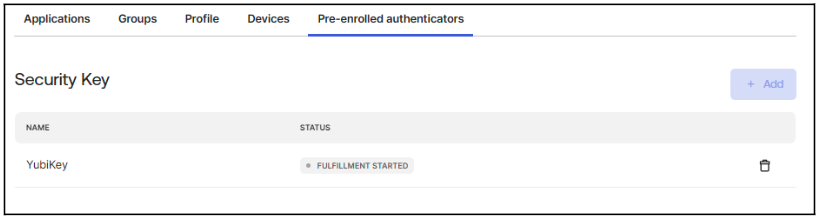
In the user profile, click Pre-enrolled authenticators and then click + Add.
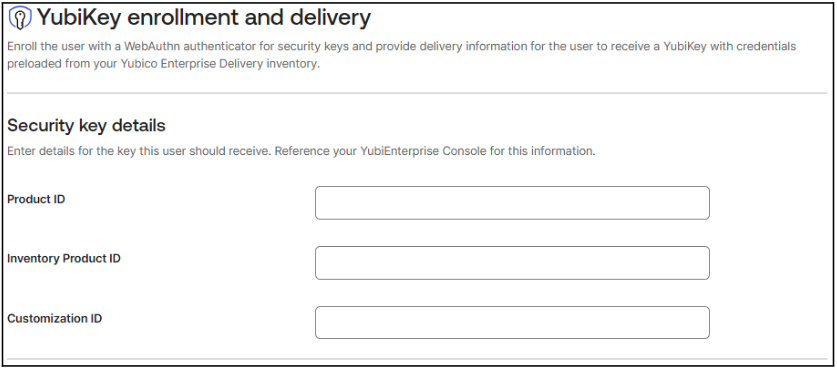
On the YubiKey enrollment and delivery page, enter the Product ID, Inventory ID, and Customization ID provided by Yubico during onboarding. See Prerequisites.
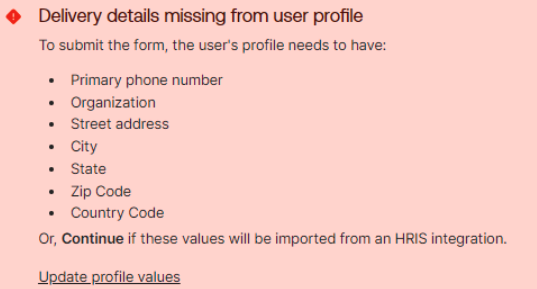
On the Yubikey enrollment and delivery page, ensure all required fields are populated: Primary and secondary Email address (PIN will be sent to both), primary Phone number, Organization, and Shipping address.
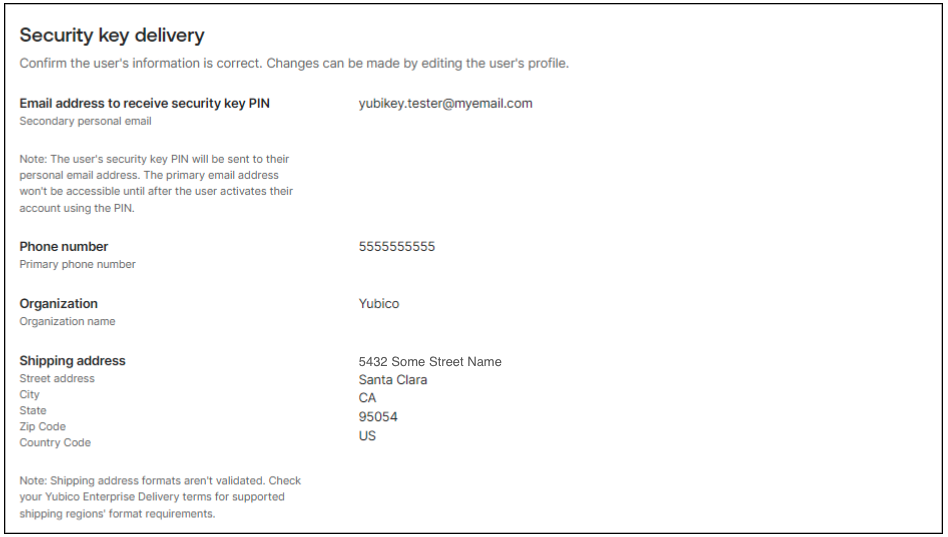
If the user’s shipping information is being sourced elsewhere, you will receive a message stating that it is missing. Ensure that the information is retrieved from another endpoint or update the profile values before continuing.
Click Continue.
The FIDO Pre-reg workflow is triggered and the fulfillment starts.
Yubico receives a request for a pre-enrolled YubiKey. The request contains all information needed to program and ship the key. When the request is fulfilled and the credential is activated by Okta, the randomly generated PIN associated with the YubiKey is emailed to the user’s secondary email address (new user). For existing users, it will be sent to their primary email address.
Note
Once the credential is programmed onto the YubiKey, the challenge and credential data, including PIN, is purged from Yubico systems.
Initial Authentication
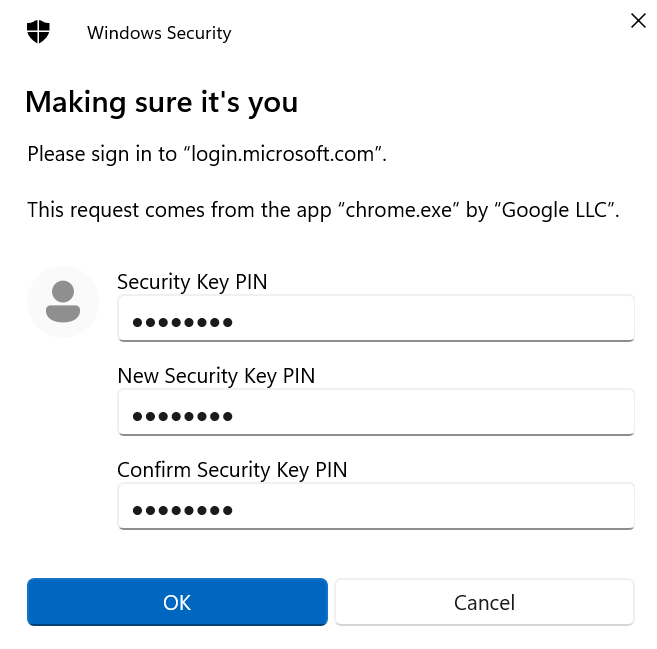
To authenticate with the identity provider, the end user presents their YubiKey and enters the provided PIN. If “Force PIN change” is set (and if supported by the platform), the end user is prompted to change the PIN when using the YubiKey for the first time, as in this example.
If “Force PIN change” was not set, the end user will be able to log in without changing the provided PIN, when using the YubiKey for the first time.
The previous step also applies when using a YubiKey Bio (FIDO and Multi-Protocol Editions) where the end user authenticates primarily using fingerprint(s) enrolled on the key (a PIN is required as fallback also when using fingerprint authentication).
Note
In most cases, the end user will not be automatically prompted to enroll a fingerprint when using a pre-enrolled YubiKey Bio the first time. Enrolling a fingerprint must be done by the end user in a separate step as described in the following.
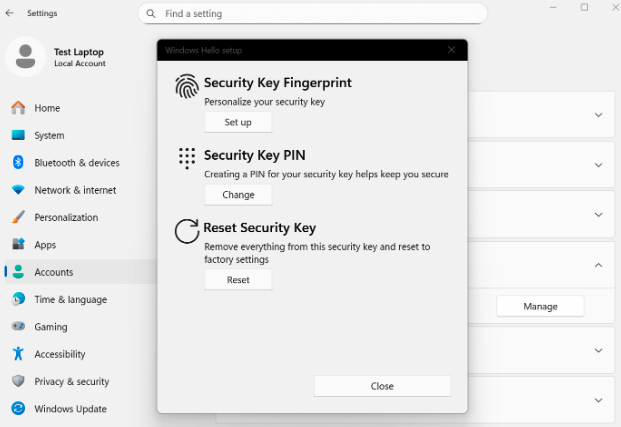
Here is an example of how to enroll fingerprints when using Windows 11: Navigate to Settings > Accounts > Sign-in options, select Security key, and click Manage. Enter the PIN for the YubiKey Bio, and follow the on-screen instructions, which will prompt you to insert the security key and touch it to enroll a fingerprint. When done, you will be prompted to provide the fingerprint (instead of the PIN) when logging in.
Different platforms (device/OS/browser) will have different flows with regards to enrolling fingerprints on YubiKeys. Refer to the account security settings information for each platform for instructions on how to enroll fingerprints. For more examples of fingerprint enrollment, see YubiKey Bio Series Specifics.
Yubico Authenticator is a convenient tool that can also be used to enroll fingerprints on a YubiKey Bio. For instructions on how to install Yubico Authenticator and enroll fingerprints, see Install the App and Enroll a fingerprint.
Select the method that is applicable to your organization’s IT platform when providing recommendations for your end users on how to enroll fingerprints on their pre-enrolled YubiKey Bio.
Troubleshooting
The following provides guidelines on how to solve common issues.
Template Errors
As an Okta administrator, you can review errors with the FIDO Pre-reg template in the FIDO Pre-reg Workflow Execution History. For more information, see Check Execution History (Okta documentation).
Okta Workflows Table Errors
If a shipment in the Okta Workflows table is in an error state due to an invalid address (address validation failed), you can manually remove the shipment in the Customer Portal. For information on how to do this, see Editing and Deleting Shipments.
If the shipment is in an error state which can be resolved (for example by correcting the address), do not duplicate or re-add the entry. Instead, manually change the state from “error” to “ongoing” in the Okta Workflows Shipments table.
Missing User Object Fields
If the submitted shipment request has an error due to a missing user object field, review the Execution History for the Create Shipment Request card in the Yubico FIDO Pre- reg template to identify the missing object.
Navigate to the user object in the Okta Universal Directory (UD) and add the missing input into the appropriate field. If using an HRIS system, ensure that the user object contains all the necessary user shipping information: Address, city, state, zip code, country code, organization, primary email, secondary email, and primary phone number. For organization, the “organization” title may need to be hardcoded in the Okta Workflow card.
Once the required information is provided, make the request again.
Custom Okta Domain/Vanity URLs
If your Okta organization uses a vanity or custom URL, the Okta Connector and the Okta Device Connector in the Workflows should be configured to use the custom URL. Both the Okta and Okta Devices Connectors will need the custom URL.