Using the YubiKey Passkey Enabler App
As a passkey provider service, the YubiKey Passkey Enabler acts as a helper app to facilitate various FIDO2 operations during passkey registration and authentication flows with your hardware security key.
For a general overview of what the YubiKey Passkey Enabler assists with in these flows, see FIDO2 functionality support.
And once you have correctly configured your Android device and are ready to use the app, see Using the YubiKey Passkey Enabler during a passkey registration flow and Using the YubiKey Passkey Enabler during a passkey authentication flow for a walkthrough.
FIDO2 functionality support
During passkey registration and authentication flows, the YubiKey Passkey Enabler will prompt for the following as needed:
- Connecting/tapping your security key
- PIN creation
- PIN change
- PIN entry
- Fingerprint entry (for security keys with fingerprint biometric capabilities only)
- Touch (user verification)
When creating or changing a PIN, the YubiKey Passkey Enabler will display PIN length and complexity requirements. If an incorrect PIN is entered (during a PIN change or standard PIN entry), the YubiKey Passkey Enabler will display the number of PIN retries remaining. Similarly, if fingerprint entry fails, the YubiKey Passkey Enabler will display the number of fingerprint retries remaining, and when retries have been exhausted, it will handle the PIN entry fallback.
Using the YubiKey Passkey Enabler during a passkey registration flow
To register a passkey with your security key and the YubiKey Passkey Enabler, do the following:
On your Android device, navigate to the WebAuthn-enabled site or app you wish to create a passkey credential for. Make sure to use a supported app or browser.
Initiate the passkey creation process. This can occur through the creation of a new account or when registering a new passkey with an existing account. The location of these settings is different for every site/app, but look for terms like “passkey”, “security key”, or “passwordless login” either during the account creation flow or in your account settings.
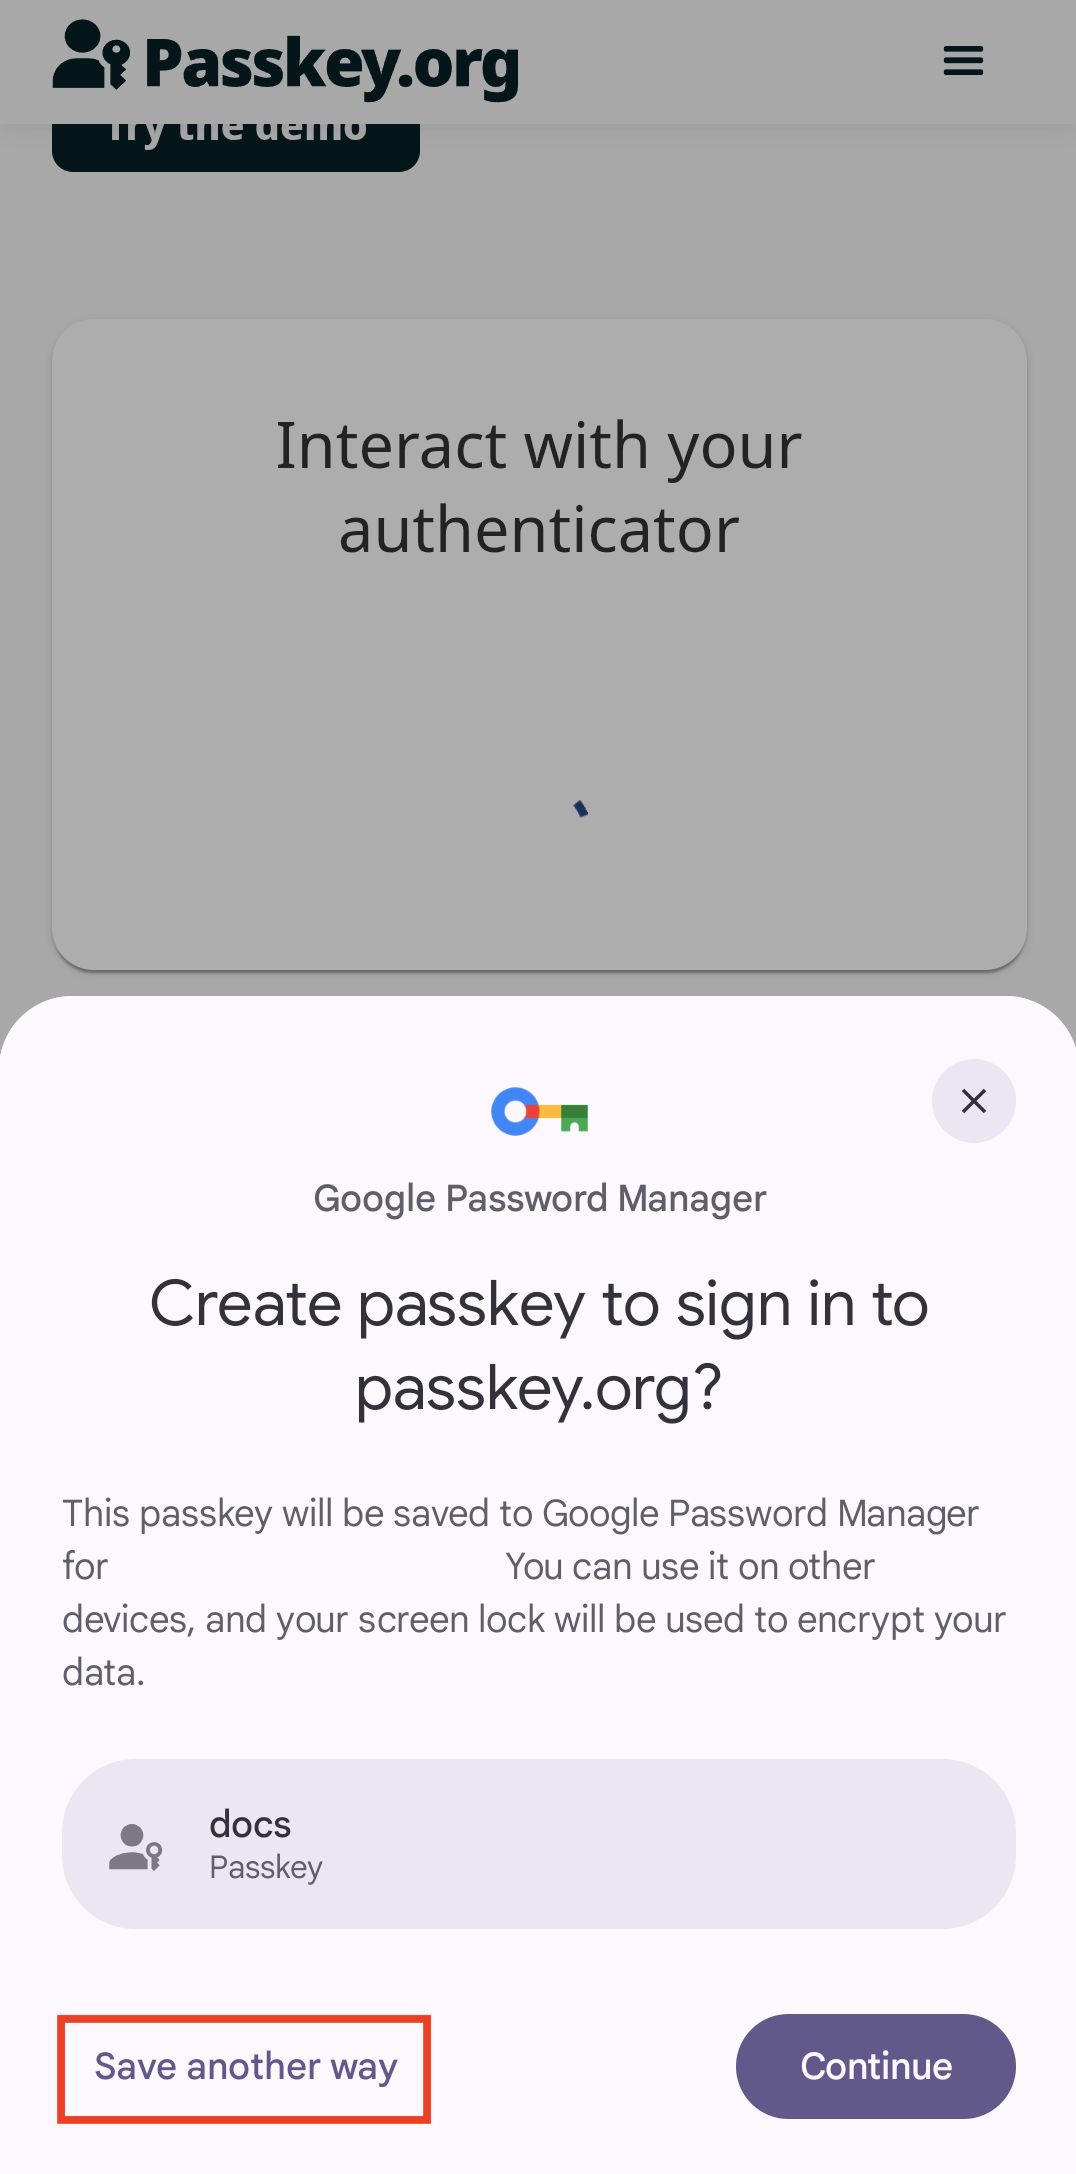
Once passkey creation has been initiated, you will see a window appear with Android’s Credential Manager at the bottom of your screen. From here, you will need to select how you want to save your passkey. Depending on how you configured your Android passkey provider settings, the YubiKey Passkey Enabler (shown as Yubico in the Credential Manager window) may be the default choice or it will need to be manually selected. If Yubico is the default option, click Continue.
Otherwise, click Save another way.
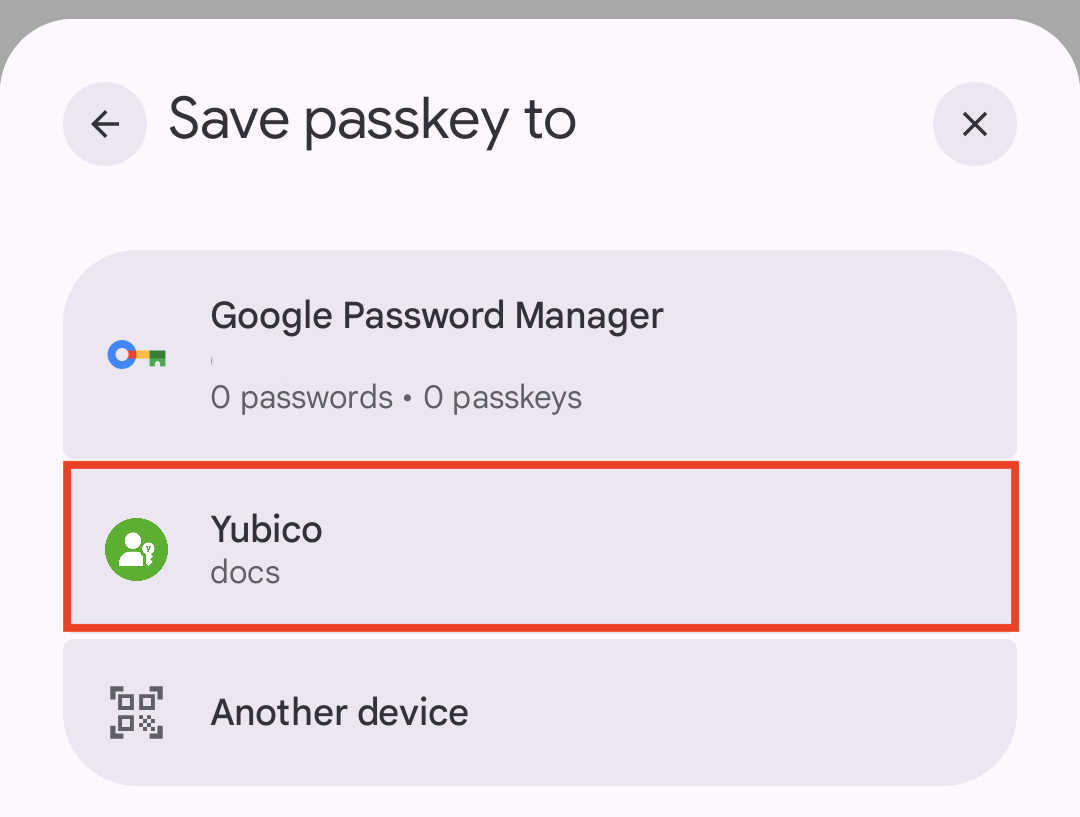
Next, select Yubico from the list of passkey providers, and then click Continue.
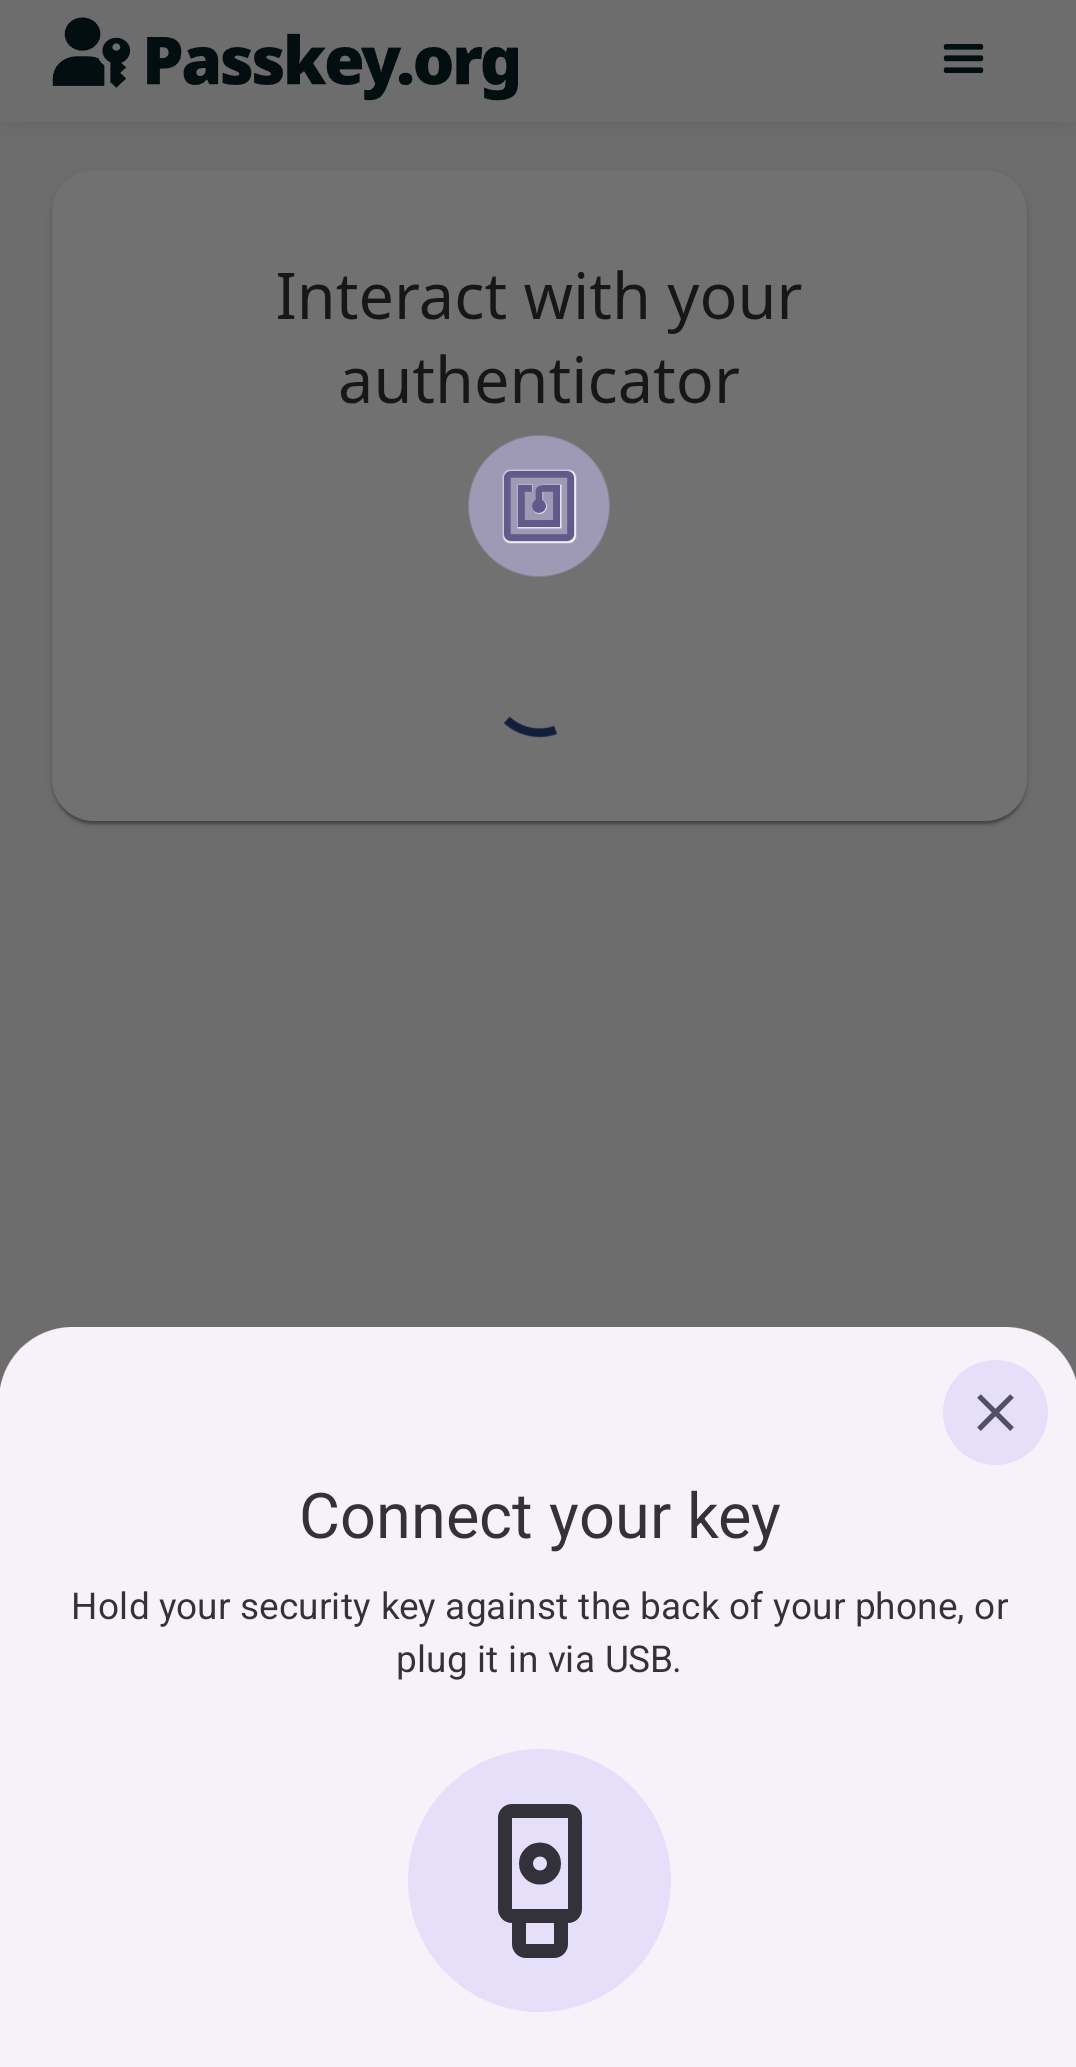
Next, you will be prompted to connect your security key. For USB connections, plug your security key into your Android device. For NFC connections, tap and hold your security key on the back of your device as close to the NFC antenna as possible.
If your device provides information about its NFC components to the app, an icon will appear on screen indicating the location of your Android device’s NFC antenna.
If Always ask for PIN is enabled, the YubiKey Passkey Enabler app will prompt for the PIN prior to connecting your security key (see the next step).
Note
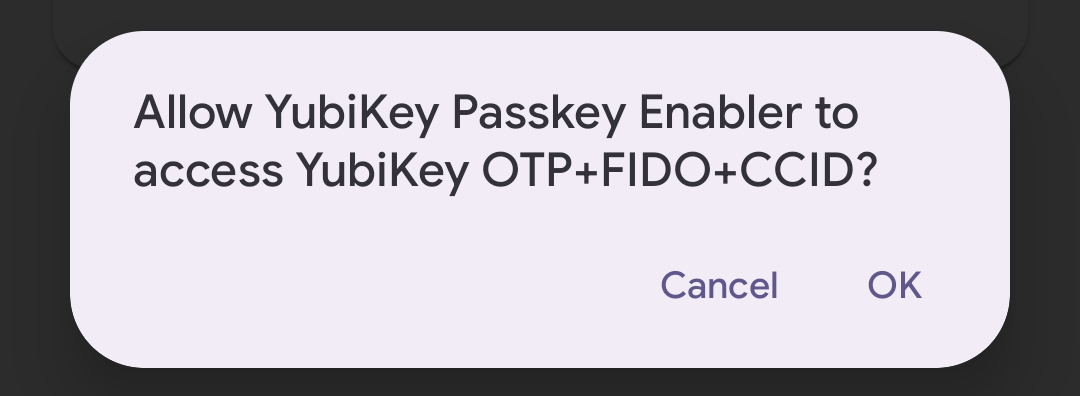
When connecting a YubiKey via USB, you may be asked to allow the app to communicate with your key. Click OK to continue.
Depending on the status of your FIDO2 PIN and the type of security key you have, do one of the following:
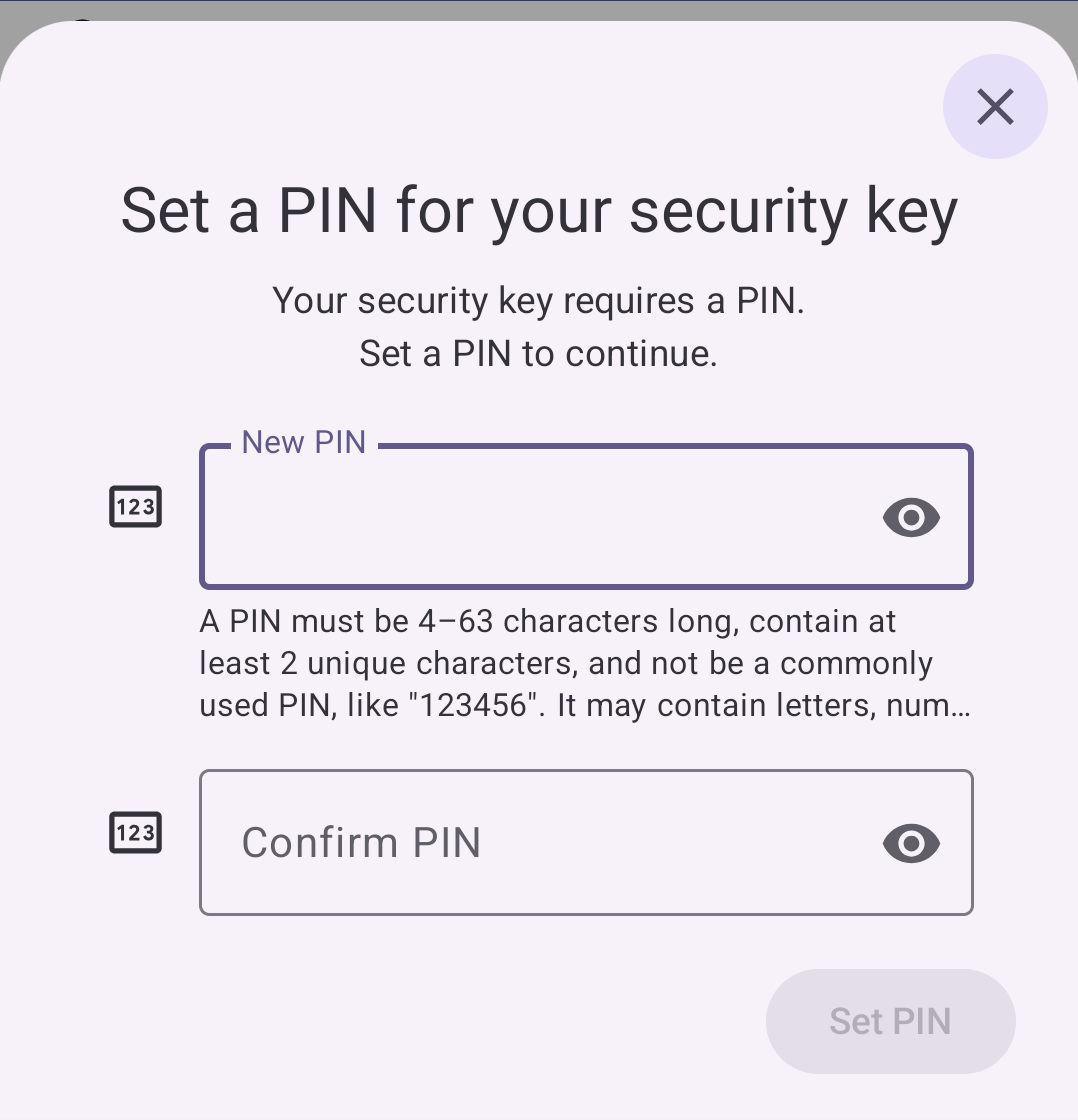
If you do not have a PIN set on your security key, you will be asked to create one. On the Set a PIN for your security key screen, enter your new PIN twice and click Set PIN.
Tip
PIN best practices:
- When creating a new PIN, do not choose something that is easily forgotten. If you forget your PIN, the only way to change your PIN without needing to enter the current PIN is to reset your security key, which removes all passkey credentials.
- To maintain the highest level of security for your accounts, do not share your PIN.
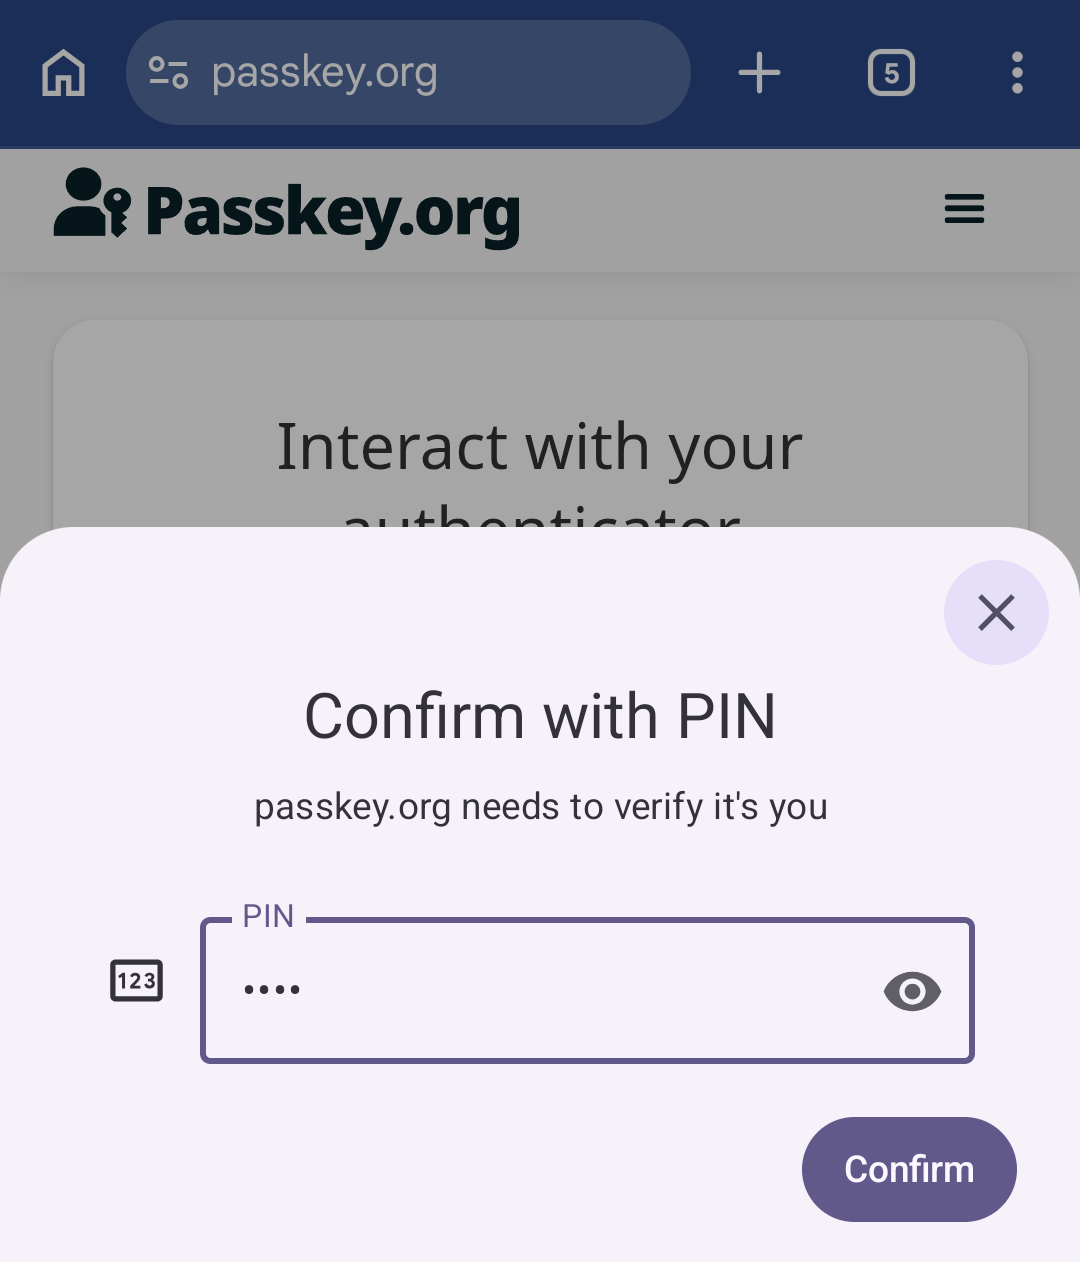
If you already have a PIN, enter it when prompted and click Confirm.
If you already have a PIN but are being asked to set a new one, enter your current PIN followed by your new PIN and click Change PIN.

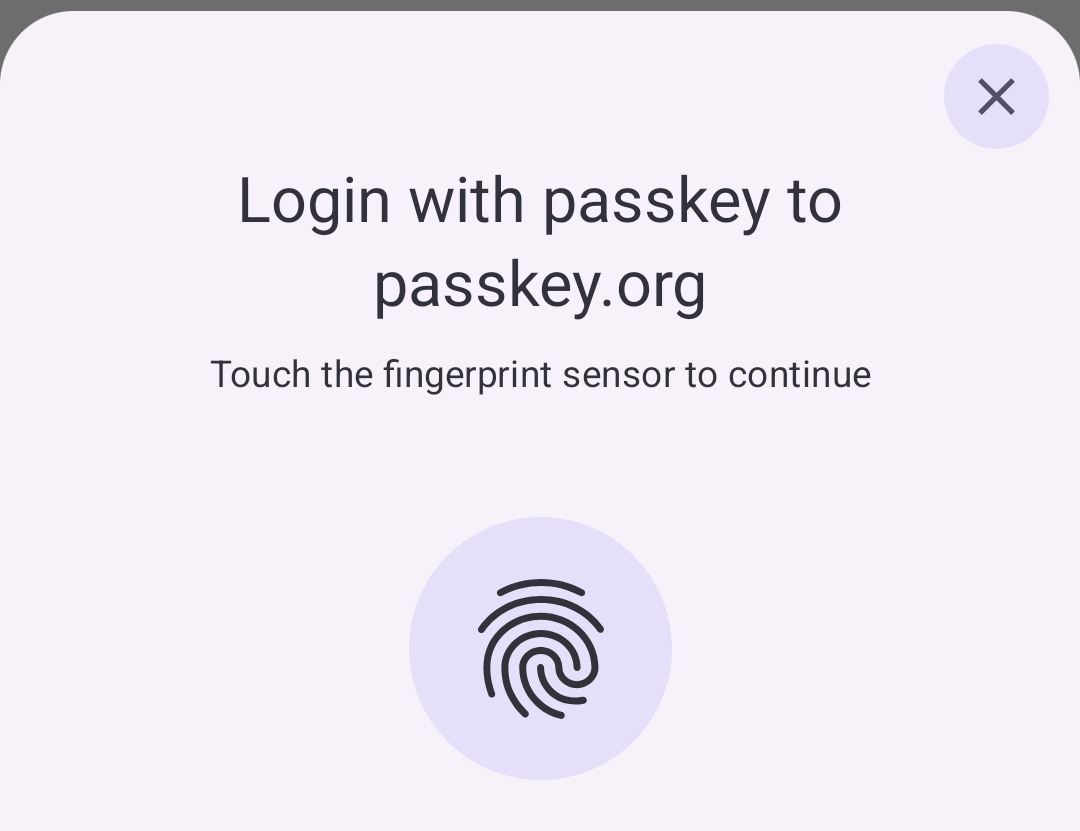
If you have a security key with fingerprint biometric capabilities and you have at least one fingerprint stored on your security key, use your fingerprint when prompted. If fingerprint entry fails, you will be asked to retry, and once your retries have been exhausted, you will be asked to enter your PIN as a fallback.
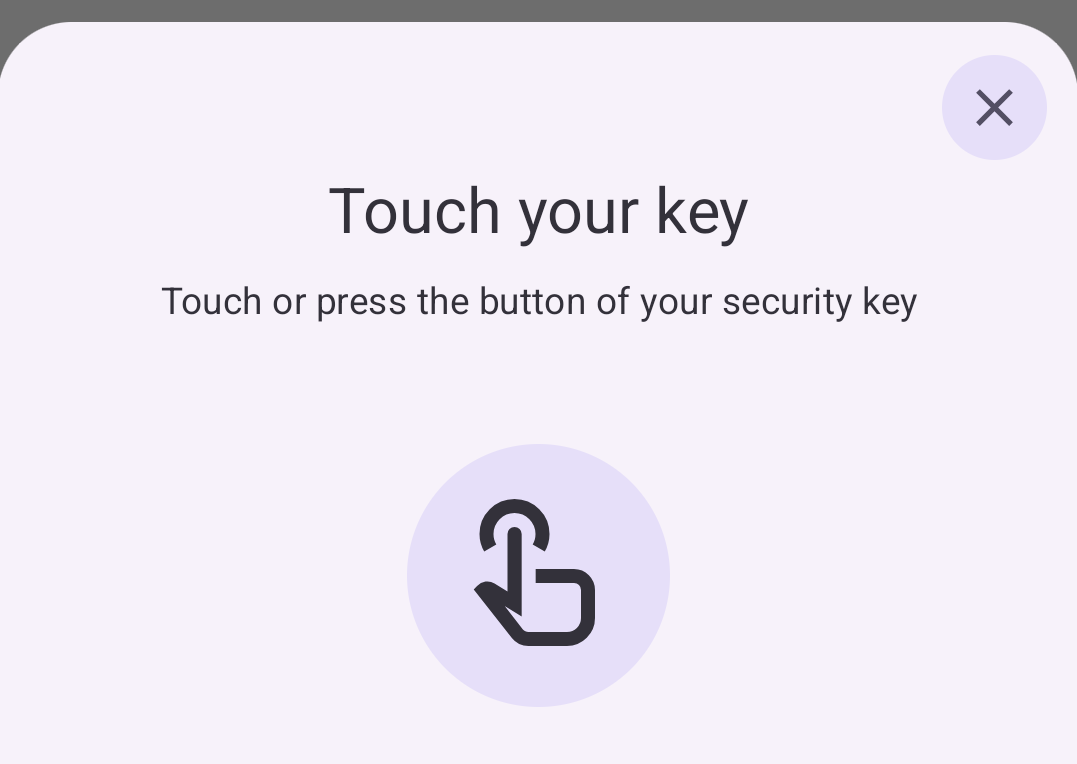
If you are registering the passkey via NFC, tap and hold your security key against your device again when prompted. If you are connected via USB, touch your security key if prompted. If the operation succeeds, passkey registration is complete.
Using the YubiKey Passkey Enabler during a passkey authentication flow
To authenticate with a passkey stored on your security key with the YubiKey Passkey Enabler, do the following:
On your Android device, navigate to the WebAuthn-enabled site or app you wish to authenticate to. Make sure to use a supported app or browser.
Initiate the authentication process (i.e. log in to your account).
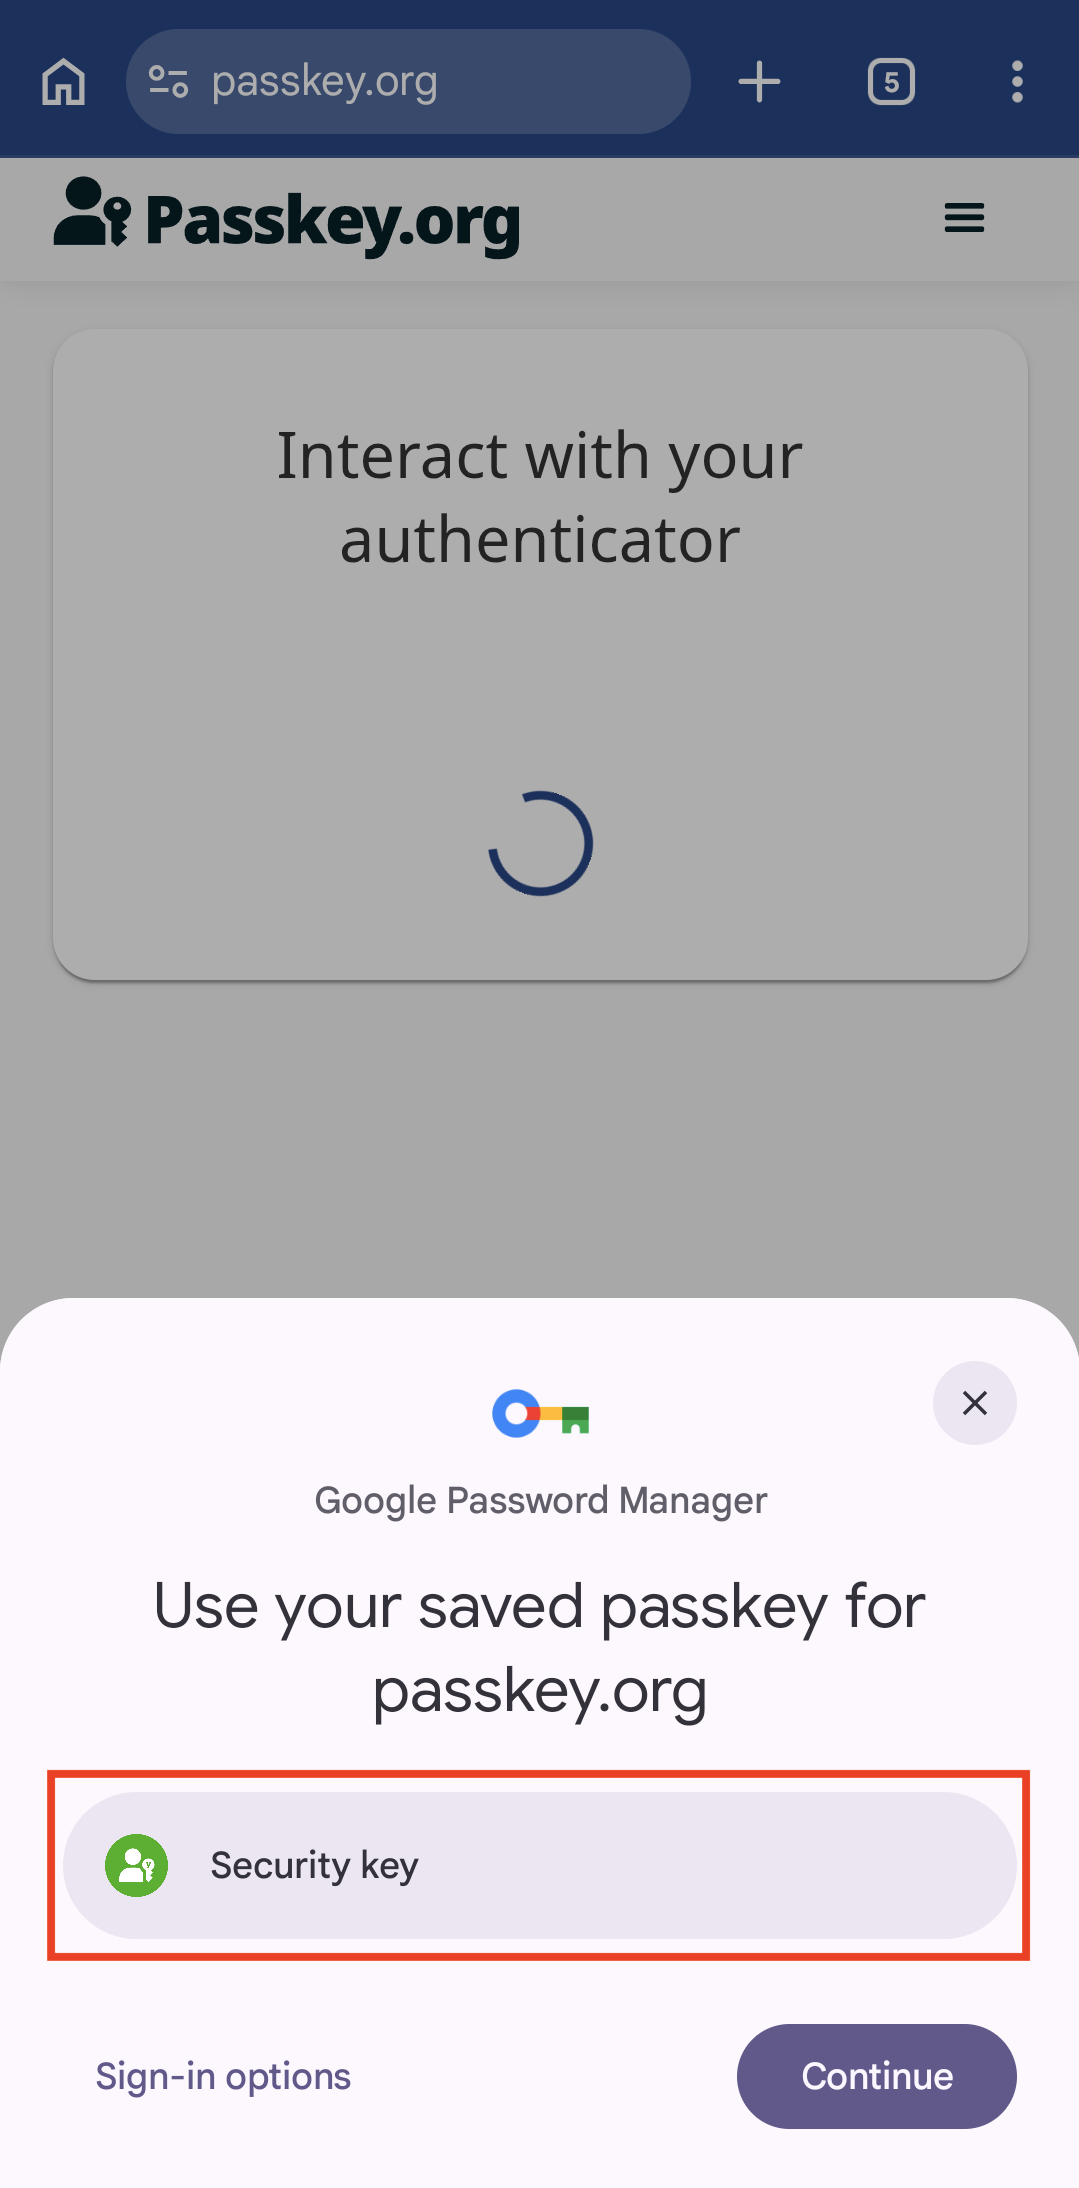
Once passkey authentication has been initiated, you will see a window appear with Android’s Credential Manager at the bottom of your screen. From here, you will need to select the passkey you would like to use for authentication. To use a passkey stored on your security key, you will need to select the YubiKey Passkey Enabler as your passkey provider.
Depending on how you configured your Android passkey provider settings, the YubiKey Passkey Enabler (shown as Yubico and/or Security key with the app icon in the Credential Manager window) may be the default choice or it will need to be manually selected. If Yubico / Security key is the default option, select it to continue.
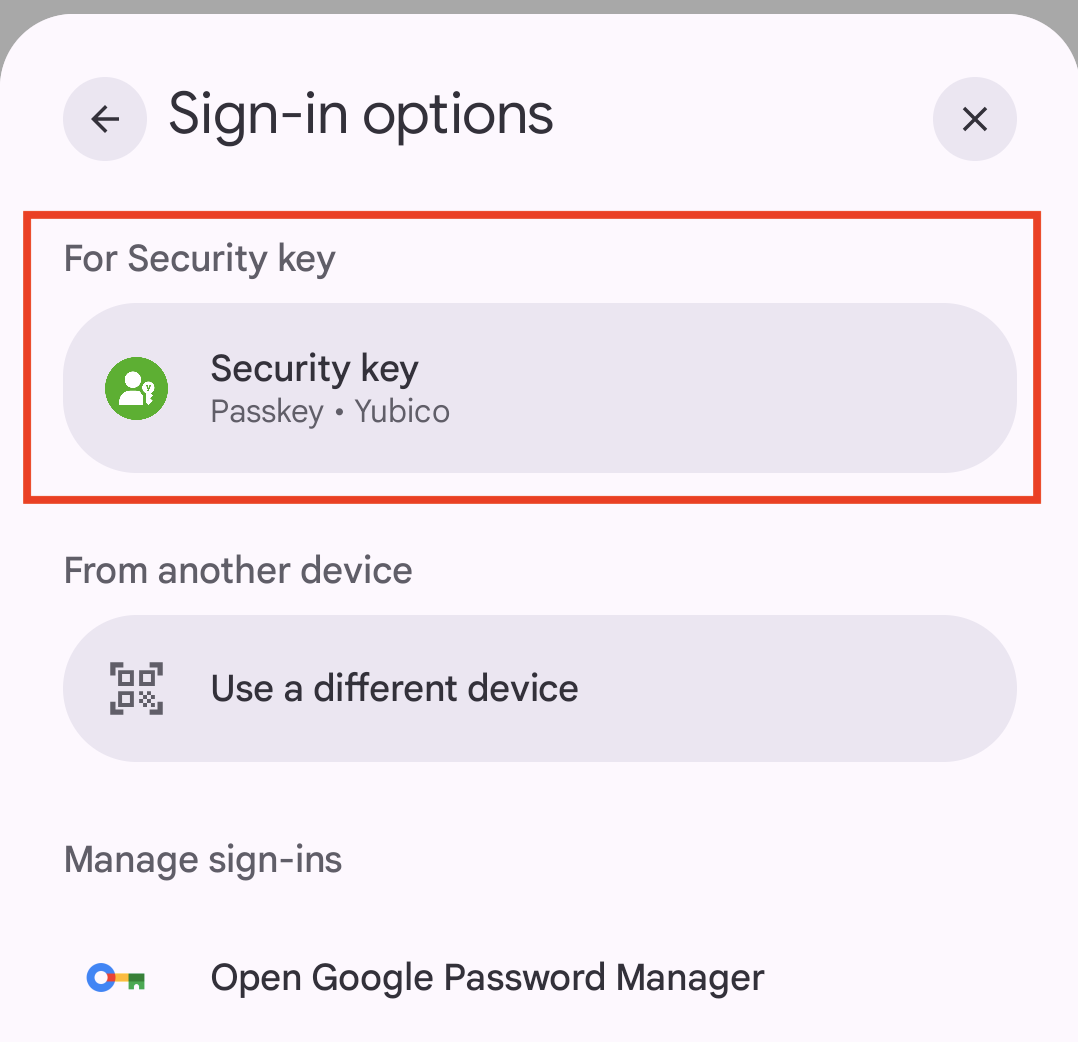
Otherwise, click Sign-in options and select Yubico / Security key from the list of passkey providers.
Next, you will be prompted to connect your security key. For USB connections, plug your security key into your Android device. For NFC connections, tap and hold your security key on the back of your device as close to the NFC antenna as possible.
If your device provides information about its NFC components to the app, an icon will appear on screen indicating the location of your Android device’s NFC antenna.
Note
When connecting a YubiKey via USB, you may be asked to allow the app to communicate with your key. Click OK to continue.
If Always ask for PIN is enabled, the YubiKey Passkey Enabler app will prompt for the PIN prior to connecting your security key (see the next step).
Depending on the status of your FIDO2 PIN and the type of security key you have, do one of the following:
If you have a PIN, enter it when prompted and click Confirm.
If you have a PIN but are being asked to set a new one, enter your current PIN followed by your new PIN and click Change PIN.
Tip
PIN best practices:
- When creating a new PIN, do not choose something that is easily forgotten. If you forget your PIN, the only way to change your PIN without needing to enter the current PIN is to reset your security key, which removes all passkey credentials.
- To maintain the highest level of security for your accounts, do not share your PIN.
If you have a security key with fingerprint biometric capabilities and you have at least one fingerprint stored on your security key, use your fingerprint when prompted. If fingerprint entry fails, you will be asked to retry, and once your retries have been exhausted, you will be asked to enter your PIN as a fallback.
If you are authenticating via NFC, tap and hold your security key against your device again when prompted. If you are connected via USB, touch your security key if prompted. If the operation succeeds, passkey authentication is complete.