Troubleshooting
Running into issues with the YubiKey Passkey Enabler? Check this page for solutions to common problems.
FIDO2 registration or authentication fails
If passkey registration fails, it could be because you either have insufficient space on your security key, you already have a passkey for that account on your security key, or the relying party you are interacting with has restricted the use of your security key.
If you have a YubiKey, you can verify if storage space or an existing passkey is an issue by going to the Passkeys screen in the Yubico Authenticator for Android app. Passkeys allows you to view all passkeys on your YubiKey and check how much space remains for additional credentials. For information on downloading and installing Yubico Authenticator, see Download the App. For information on the Passkeys screen in Yubico Authenticator, see Viewing and deleting passkeys.
Note
YubiKeys with firmware version 5.7 and later can store up to 100 passkeys, but YubiKeys with firmware version 5.0 through 5.6 can only store up to 25 passkeys.
If the relying party, such as Microsoft Entra, has restricted the use of your security key (which is typically done via AAGUID), this may be indicated in the error message received when attempting passkey registration. The only workaround is to use a security key from the relying party’s allow list.
If passkey authentication fails because you cannot get past the PIN entry screen despite entering the correct PIN, your PIN may be blocked. See The PIN is blocked for more information.
NFC scanning fails
If you are attempting to perform a FIDO2 operation via NFC, but the NFC scan won’t initiate, it could be due to a few different issues:
Your security key is too far from the NFC antenna
The YubiKey Passkey Enabler will display a circular chip icon at the location of your device’s NFC antenna. Touch your security key on the back of your device as close to this icon as possible.
NFC connectivity is disabled on your Android device or YubiKey
See Toggle NFC connectivity for information on how to check and turn on NFC connectivity on your Android device. To check if NFC is disabled for the FIDO2 application on your YubiKey and to re-enable it, you must use the Yubico Authenticator app. See Toggle YubiKey applications on/off for more details.
Your Android device and/or security key is not NFC-compatible
See Platforms and Requirements for more information on device and security key requirements.
If the NFC scan fails after initiation, you may be removing the security key from the sensor before the process has completed. Retry the operation and hold the key against your device until the YubiKey Passkey Enabler indicates that the operation is complete.
The PIN is blocked
With FIDO2-compatible YubiKeys, you have a total of 8 attempts to enter the PIN correctly during a FIDO2 operation. Once you have exhausted these attempts, the FIDO2 application on your YubiKey becomes blocked, and you will not be able to perform any FIDO2 operations until your YubiKey’s FIDO2 application is reset.
A FIDO2 reset removes the PIN and all FIDO2 credentials on your YubiKey, meaning that you will no longer be able to authenticate to any website for which you had registered your YubiKey as a passkey. (For this reason, Yubico recommends registering a backup YubiKey to maintain account access.) Once your YubiKey is reset, you will be able to re-register it with your accounts (as long as you can access them via a backup YubiKey or other recovery method).
To reset the FIDO2 application on your YubiKey, we recommend using Yubico Authenticator for Android. For information on downloading and installing Yubico Authenticator, see Download the App. For instructions on performing a FIDO2 application reset with the Yubico Authenticator app, see Factory reset.
Note
Once the FIDO2 PIN is entered correctly during an operation, the PIN retry count resets to 8. You can check the number of PIN retries remaining on your YubiKey via Yubico Authenticator. To do so, open the app and navigate to the Passkeys or Fingerprints screens. You will find the retry count next to the Change PIN action under MANAGE, which can be navigated to via the menu icon in the upper right corner of the app.

I’m not getting prompted for biometrics (fingerprint) during authentication
If you are attempting to perform FIDO2 authentication with a YubiKey Bio Series key and you are not being prompted to use your fingerprint, this may be because you do not have any fingerprints stored on your YubiKey. While the YubiKey Passkey Enabler can facilitate biometric authentication, it cannot handle the process of adding new fingerprints to your YubiKey.
To add a fingerprint to your YubiKey, we recommend using Yubico Authenticator for Android. For information on downloading and installing Yubico Authenticator, see Download the App. For instructions on adding a fingerprint to your YubiKey with the Yubico Authenticator app, see Registering and managing fingerprints.
I do not see the option to select the YubiKey Passkey Enabler during a FIDO2 operation
If you do not see the YubiKey Passkey Enabler as a selectable option in the Android Credential Manager window during a FIDO2 operation (it will be listed as Yubico), you may not have enabled the app as a passkey provider service yet. See Enable the app as a passkey provider service in your Android settings for more information on what this setting is and how to configure it.
Getting additional help
Can’t find a solution to your issue? Submit a help request to Yubico’s Customer Support team.
Collecting application logs
While troubleshooting an issue with Yubico’s support or development teams, you may be asked to collect and submit application logs. If an action within the app is failing, logs collected while performing that action can provide helpful diagnostic information.
Log collection begins as soon as the app is started. If the log level is changed while the app is running, the logs collected from that point onward will be at the new level.
Logs can be copied to the clipboard from within the app. There is a fixed size buffer for the “Copy to Clipboard” button in the app, so if the log is longer than 1000 lines, only the latest 1000 will be included.
Log levels
The log levels include ERROR, WARN, INFO, DEBUG, and TRACE, in order of increasing verbosity. The default level is INFO. In general, the following information is collected for each log level:
- ERROR - Any error that occurred, which is often an action that could not be performed.
- WARN - Something failed, but the app was able to recover and complete the action, or the failure didn’t impact the action.
- INFO - What the app is doing without specific details. For example, a credential was added, etc.
- DEBUG - More detailed information about actions performed. This can include things like the name of an account and the method with which the account was added. Some information at this level might be considered sensitive identifiable data (usernames, YubiKey serial numbers, etc).
- TRACE - Even more detailed than DEBUG and INFO. It includes ALL raw traffic to/from the security key. This includes things like origin URLs and credential IDs.
Be very cautious when sharing logs containing DEBUG and TRACE data given that they may contain sensitive information.
Generating logs within the app
To generate log data, do the following:
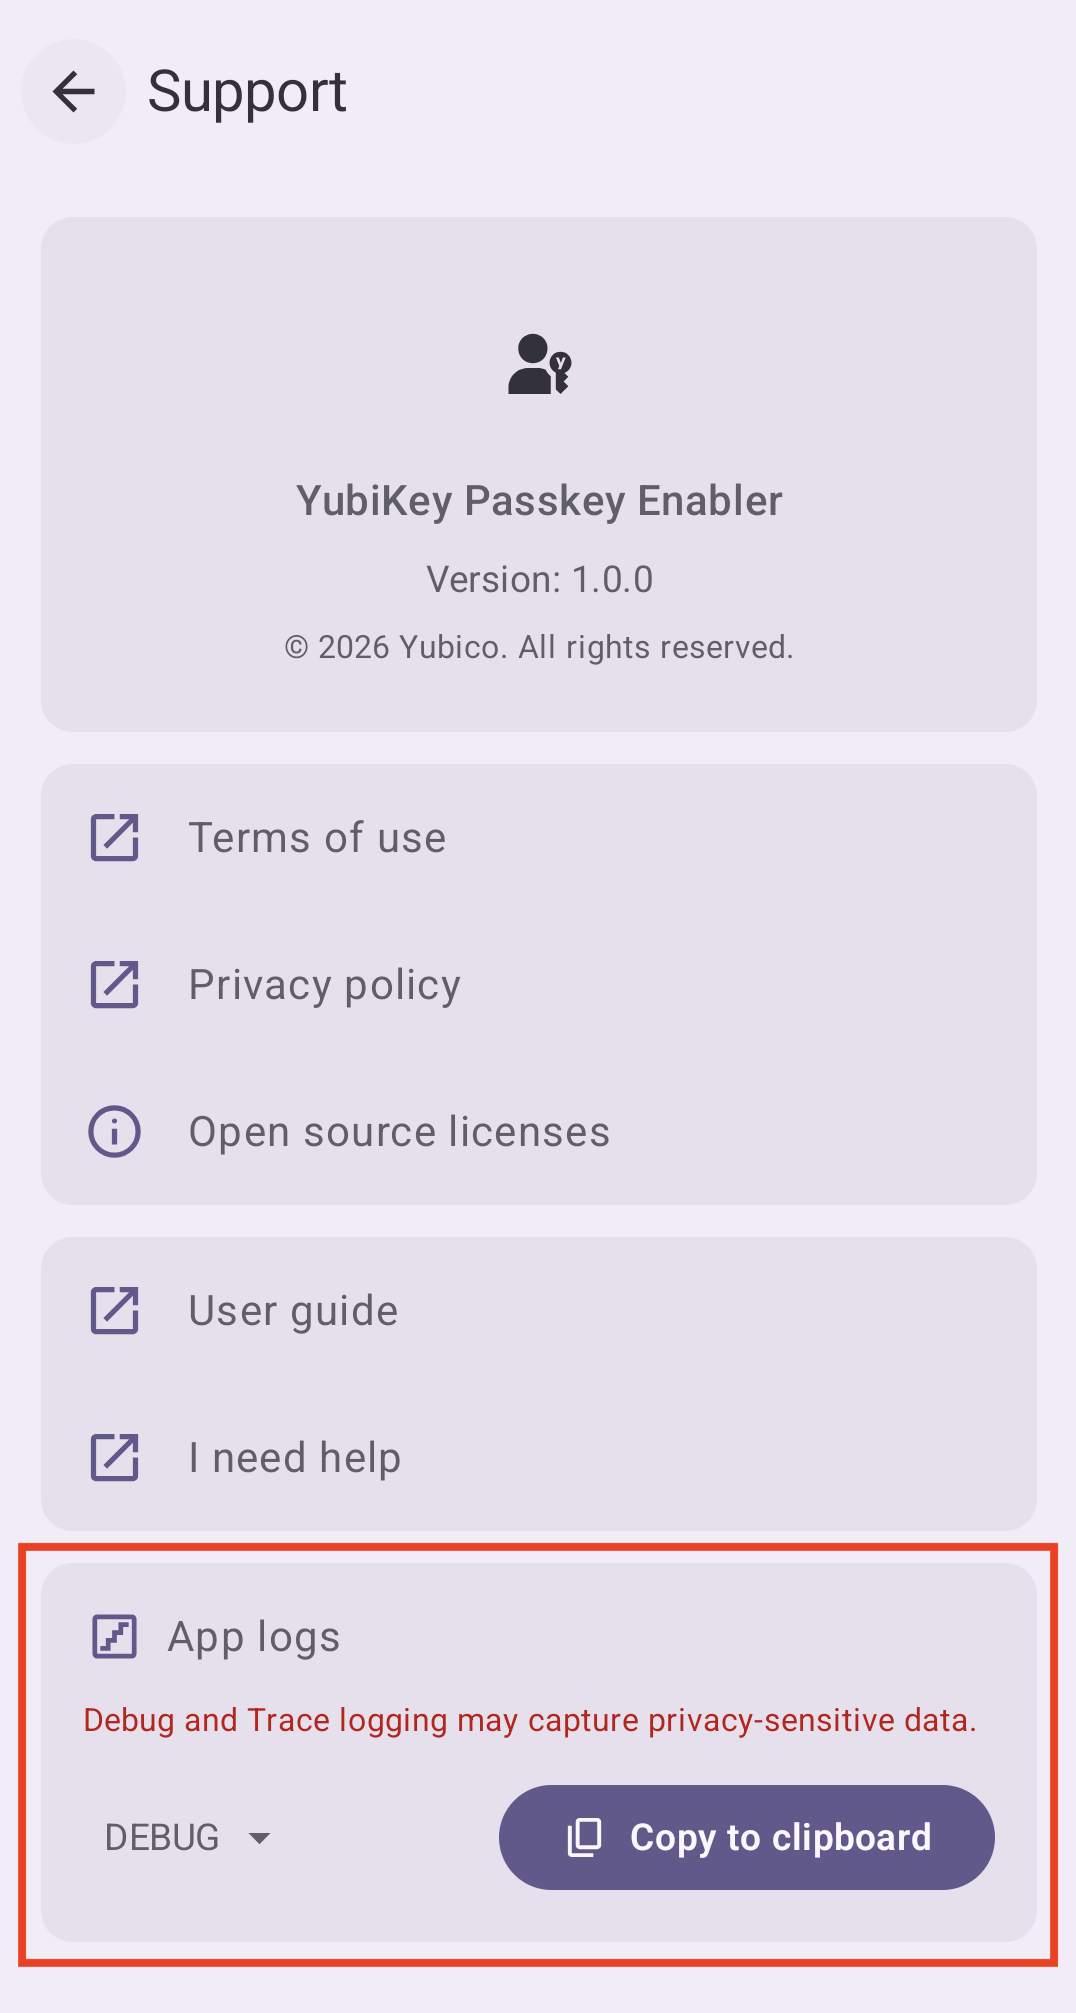
Open the YubiKey Passkey Enabler app, click on the menu icon in the upper right corner of the app, and select Support.
Select the appropriate log level from the drop-down menu in the App logs section.
If there is a particular operation you want to collect logs on, such as passkey authentication in a browser, perform that operation. Now go back to Support and click the Copy to Clipboard button. Paste the log information into a text file, email, or other relevant file/location and save it.
Important
Once you click Copy to Clipboard, the log buffer (which contains the logs you just copied) will be removed, and the log level will be reverted back to INFO. Make sure to save your logs before overwriting your clipboard.