Configuring YubiEnroll with Okta
The following describes how to set up YubiEnroll in the Okta tenant and configure the required user permissions.
Configuration Steps
The configuration steps involve the following:
- Registering the YubiEnroll application in Okta.
- Configuring the YubiEnroll permissions in Okta.
- Adding the Okta provider in YubiEnroll.
When you have successfully completed these steps, you are ready to enroll YubiKeys on behalf of end users in your organization.
Registering the YubiEnroll App
Note
To register the YubiEnroll app in the Okta tenant as described in the following, you need Super Admin or Application Admin permissions. For more information, see Configuring Permissions.
When configuring the Okta provider in YubiEnroll, the following parameter values are needed:
client_iddomainredirect_uri
These parameter values are created when registering the YubiEnroll (OAuth) application in Okta. To register the YubiEnroll app, open the Admin Console, go to Applications > Applications, and click Create App Integration.
When registering YubiEnroll, ensure to select OIDC - OpenID Connect as the Sign-in method and Native Application as the Application type in the Create new app integration dialog.

When adding the redirect URI in the New Native App Integration dialog, the Sign-in redirect URIs must start with
\http://localhost. You also need to specify a port, for example\http://localhost:8080/yubienroll-redirect.Ensure to select the Refresh Token option under Grant type > Core Grants so that the YubiEnroll app issues a refresh token once it expires.

For more details on how to register the YubiEnroll app, see Create an OAuth 2.0 app in Okta (Okta documentation).
During registration, the following values needed to configure YubiEnroll are created:
- Application (client) ID
- Directory (tenant) ID
- Sign-in redirect URI
Configuring Permissions
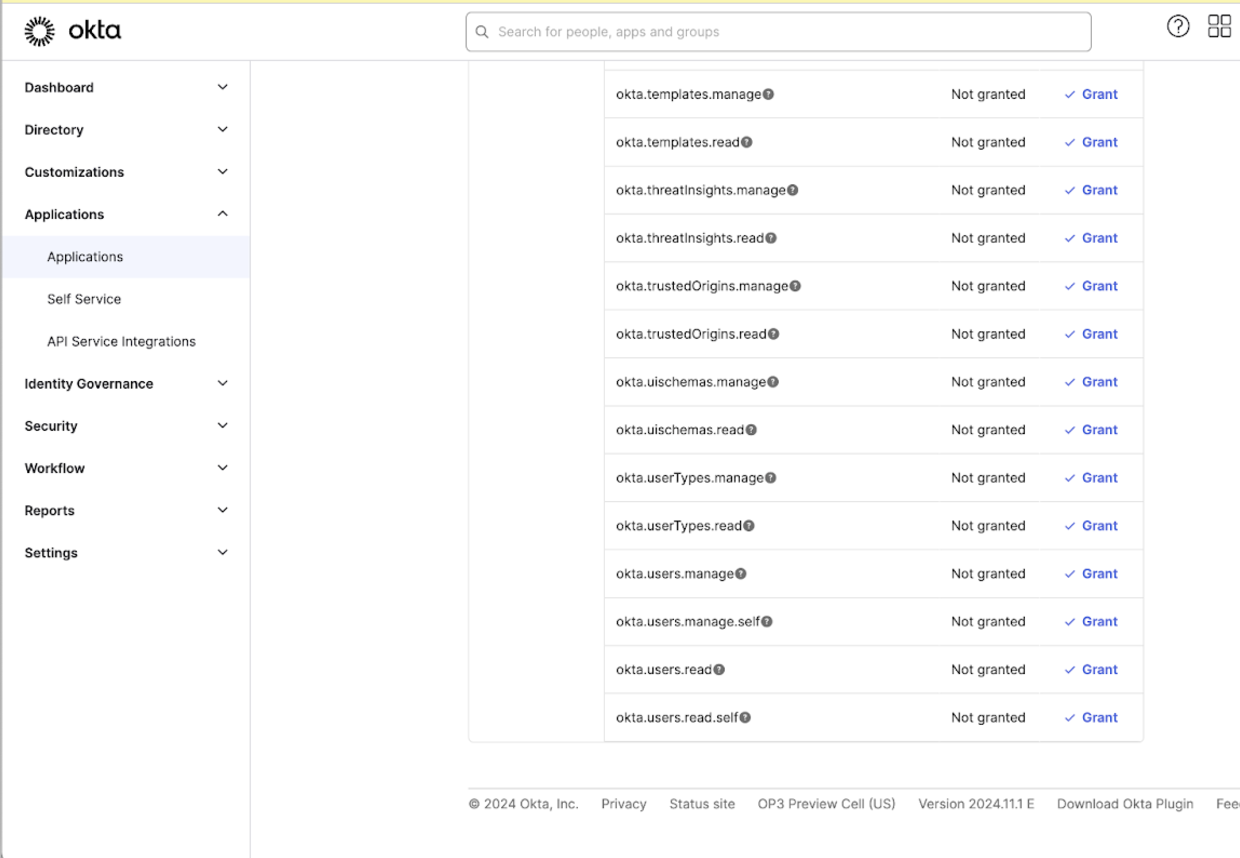
The permissions required by YubiEnroll in Okta are okta.users.manage and okta.users.read. To configure these, open the YubiEnroll app in Okta, select Okta API scopes, locate the scopes and click Grant for each of them.
To be able to perform enroll on behalf of an end user, the user (IT admin for example) must have either the Super Administrator, Group Administrator, or Organization Administrator role in Okta.
Preparing to Add the Okta Provider
Before you can run YubiEnroll with Okta, you must add the provider configuration in YubiEnroll.
When adding a provider configuration in YubiEnroll you need the following values, created when the app was registered:
- Application (client) ID
- Directory (tenant) ID
- Redirect URI
The Client ID and Redirect URI can be found in the General tab in the Applications view in Okta. The Okta Domain (tenant ID) can be found in the Okta admin dashboard when clicking on the admin profile in the upper right corner, it is displayed under the email address.
For information on how to add a provider configuration in YubiEnroll, see Adding Provider Configurations.
Using Custom Domains
If you are using a custom domain with Okta, some applications might still require an \*\.okta.com sub-domain instead of a custom second level domain.
The FIDO2 credentials are registered per domain, and in cases with two domains the credentials must be registered on both. For more information, see Register FIDO2 (WebAuthN) Keys under both Custom Domain URL and Okta Org URL (Okta documentation).
In a scenario when using YubiEnroll with a default Okta domain and a custom domain, you need to register two FIDO2 credentials for an end user account. You can address this by having two enrollment profiles pointing to the same Okta tenant, but with different domains. This results in two FIDO2 credentials being pre-registered on the YubiKey for the end user. For more information, see Creating Enrollment Profiles and yubienroll profiles.
You can also customize your Okta domain name with your company’s own domain name. For example, instead of the default <companyname>.okta.com, you can create login.companyname.com.
To ensure YubiEnroll is configured to use the correct domain, review the domain configuration during the provider setup. Ensure user credentials are being enrolled for the domain for which they need access. If a user requires access to both the default Okta domain and the custom domain, configure an additional Okta Provider using the same application, but using the custom domain name in the configuration. For more information, see Customize domain and email address (Okta documentation).
Searching for Users
In Okta a user needs to have a username and an email. By default the username is an email address, and usually the username and the email are identical, but they do not have to be.
When connected to the Okta IDP, you can search for a user either by display name (firstname + lastname), username, or primary email address. The returned search result includes the ID, Display Name, Username, and Email for each user.
Note
When performing enrollment operations on behalf of a user, you can only use the username or user ID values. Using the email address does not work. For search examples, see YubiEnroll Commands.