Smart Card Certificate Provisioning
Now that your smart card certificates have been imported onto your YubiKey, you must provision the public portion of the certificates onto your iOS Keychain through Yubico Authenticator. After completing this step, you will be able to use the Smart Card on iOS feature to authenticate to the websites that require those smart card certificates on the Safari browser.
Provision Your Public Certificate
If you haven’t already, download and install the Yubico Authenticator application (v.1.6 or newer) onto your iOS device.
Open Yubico Authenticator.
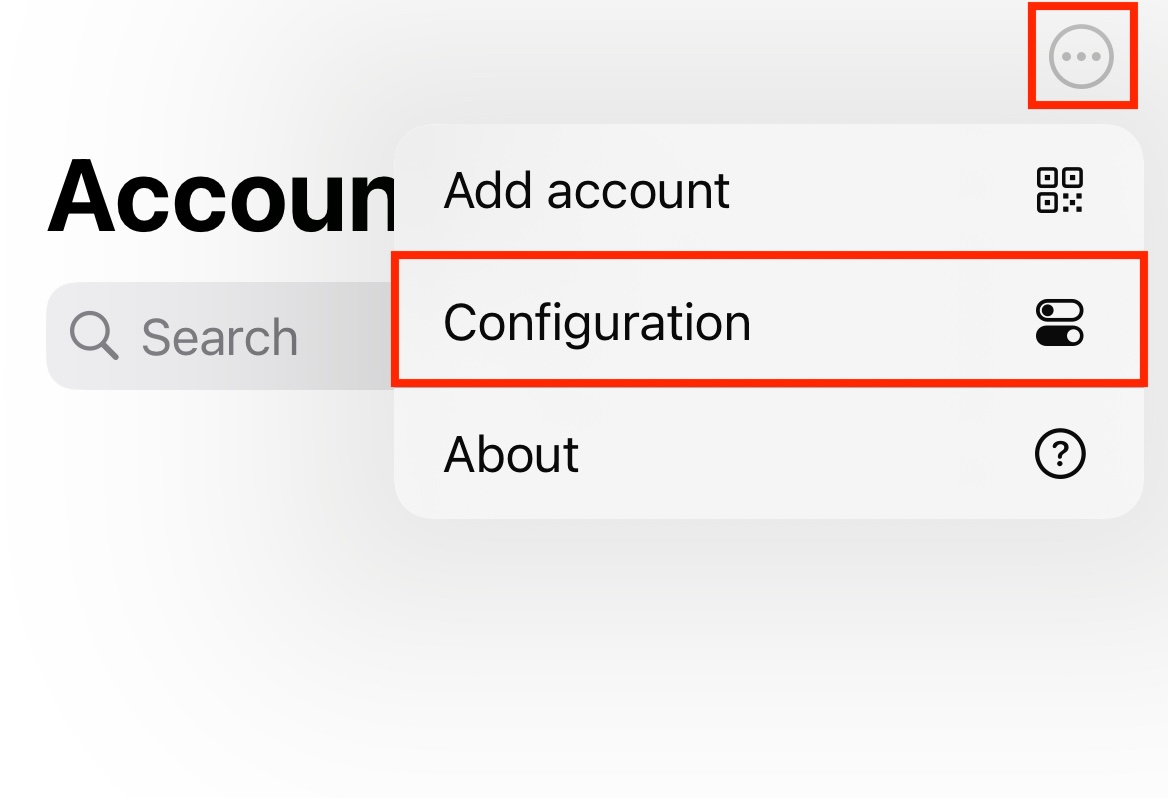
On the home screen of Yubico Authenticator, click on the three dots (…) in the upper right corner of the screen and select Configuration.

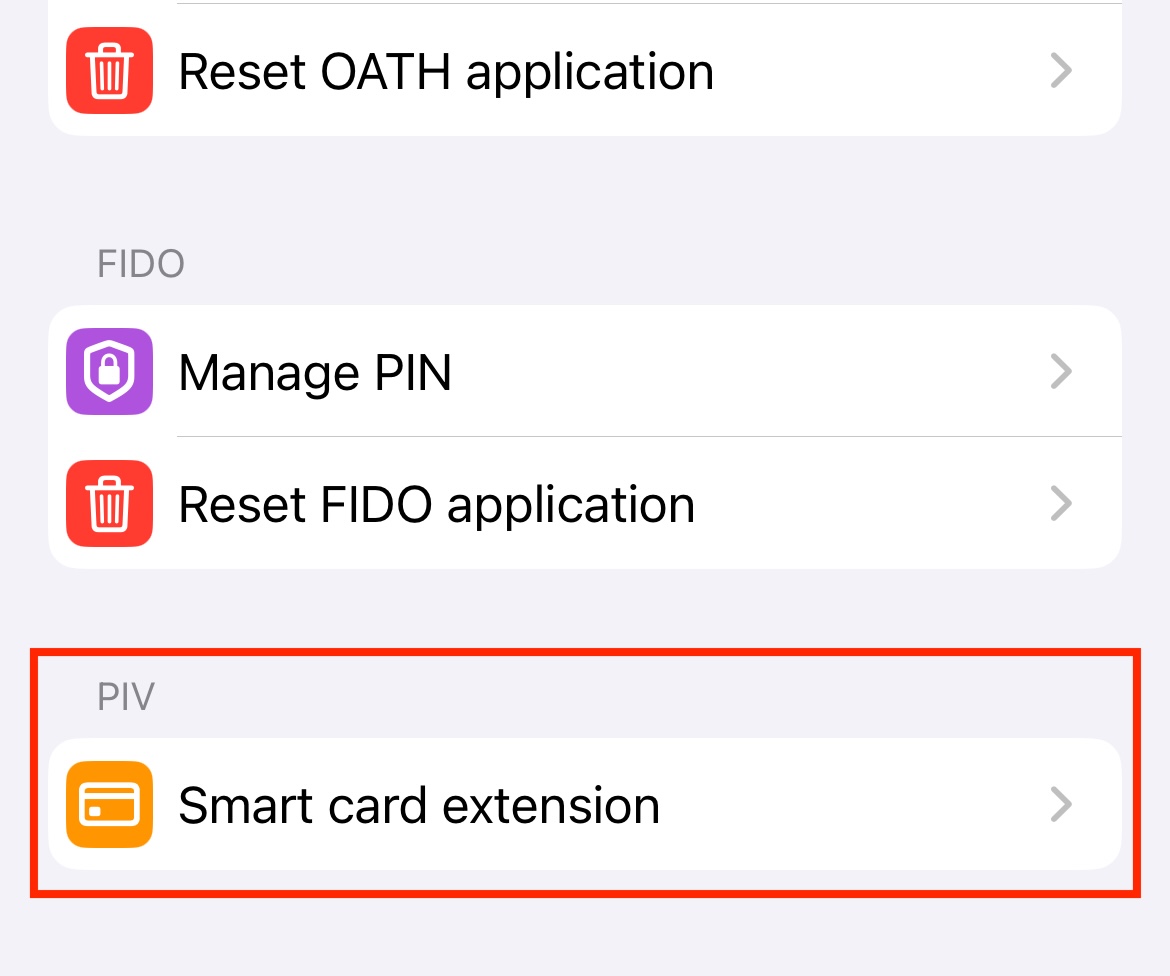
On the Configuration screen, select Smart card extension under the PIV section.

Insert your YubiKey into your device.
To connect via NFC on iOS, swipe down on the screen and tap your YubiKey on the back of your device to scan.
Note
Lightning is currently the only supported physical connection type for iOS and iPadOS devices. NFC wireless connections are supported on iOS but not on iPadOS. For a complete breakdown of Yubico Authenticator functionality by platform and connection type for each YubiKey model, see the Yubico Authenticator Functionality table.
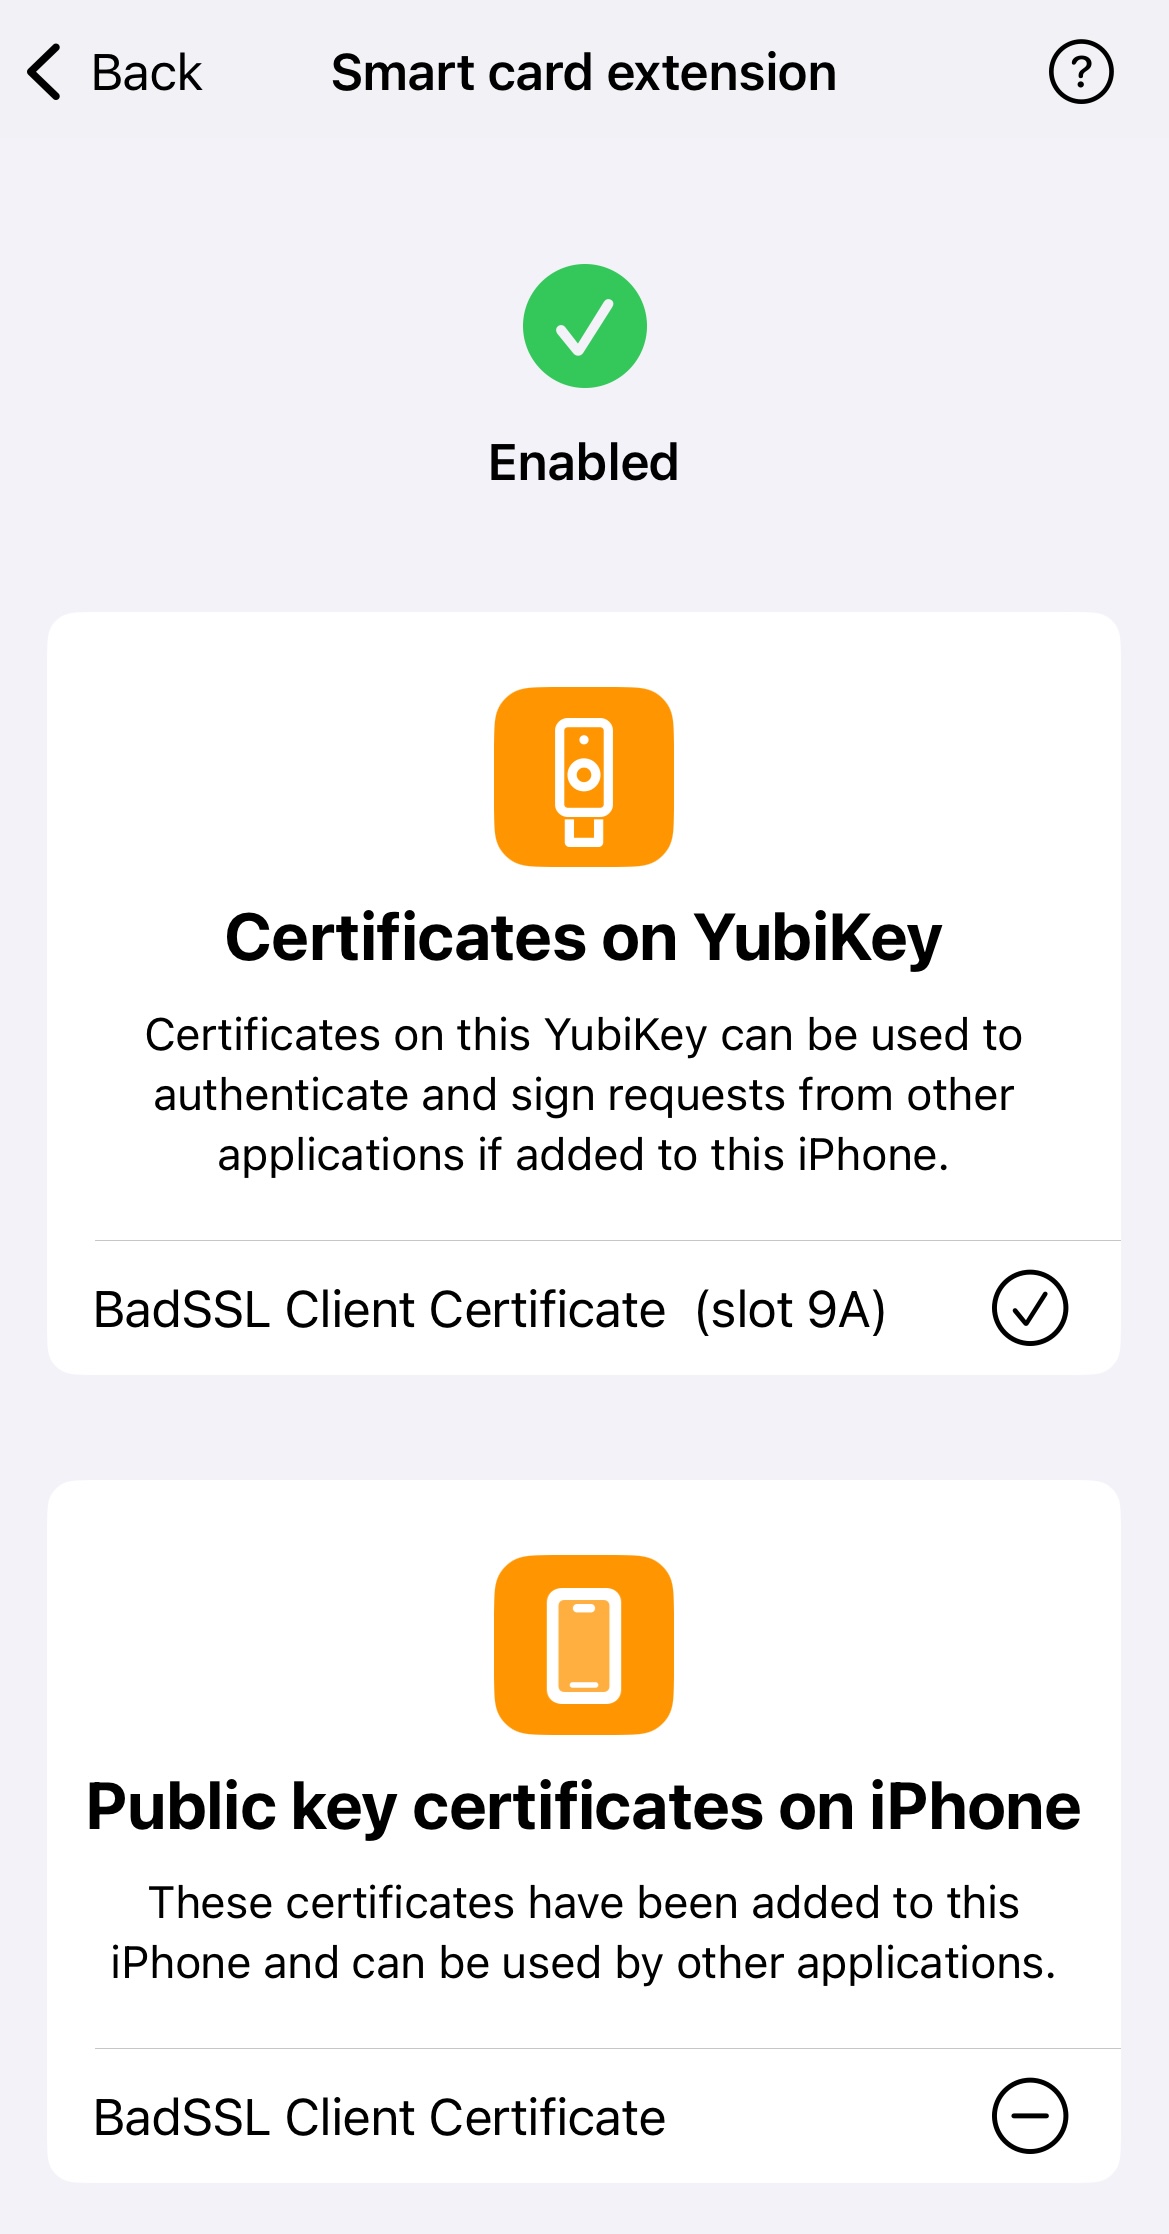
Once your YubiKey has been detected by the app, all certificates stored on your YubiKey will appear under the Certificates on YubiKey section. To provision the public certificate from one of your PIV application slots to your iOS Keychain, click the (+) icon next to the certificate name.
If the provisioning was successful, the name of your certificate will appear under the Public key certificates on iPhone section. You may remove certificates from your iOS Keychain at any time by clicking the (–) icon next to the certificate name.

Next Steps
Congratulations! Your public certificate has been provisioned to your iOS device, and you are now ready to authenticate to the website requiring that smart card certificate on Safari. See Authenticating with Smart Card on iOS for guidance.